|
|
Post by Hoovie on Feb 8, 2018 20:15:58 GMT
This is a potted refresh post for my Conversion of a VW LT Minibus into a themed CamperVanOriginal Posts are fronm June 2017 through to December 2017 The Beginningwell, not a campervan yet, but right now is offcially a "Minibus" in a 16 Seater Private/LGV Category 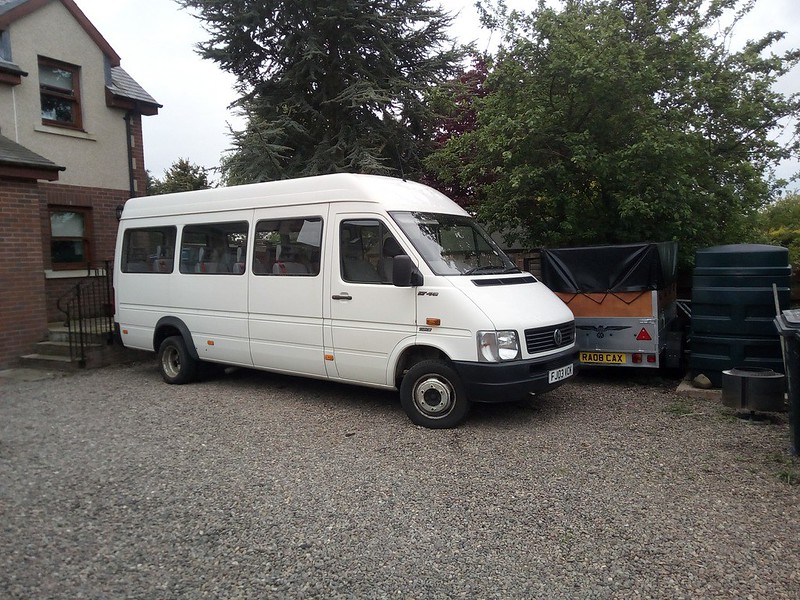 LT Minibus in its new Home LT Minibus in its new Home by David, on Flickr This is going to replace my VW T5 Campervan. I want to be able to stand up!! Sent the V5C away for it to become a "Van with Windows" with it going into a Private/HGV Category. This is an interim step until I do the conversion and I then send the V5C away again for it to become a "Motor Caravan". No strict need for the interim step, except it will allow me to tax at the lower rate of £165 instead of the LGV rate of £240, and that will carry over when it is a Motor Caravan :s_cool The vehicle is the LT46 LWB, which means 4.6t GVW (hence being able to be classified as the HGV discussed above) as it needed to be able to take the weight of 14 extra rear seats, plus 14 bodies sitting in those seats. The typical DIY conversion (so using standard ply often rather then lightweight stuff) ends up with these LT LWB Campers coming in at around 3.2t fully fueled. This gives a massive payload of 1.4t :shok: So no problems there whatsoever, but what that also means is that it would be possible to downplate the vehicle, with no mechanical changes whatsoever to a 3.5t vehicle should there be a need for it to be driven on a standard "B" car license (as a 4.6t, you need a C or C1 licence), and as a 3.5t vehicle it still will have a payload of around 300kg, similar to any other PVC (Panel Van Conversion). the only downside other then payload is the road tax would go up again to £240  I'll post some photos of it as it progresses :s_drinks |
|
|
|
Post by Hoovie on Feb 8, 2018 20:26:13 GMT
Some Interior ChangesWaiting on my contact to be back at work before I can get the service parts ordered, but did some work on the interior ... Now this is how the interior was laid out when I bought it: 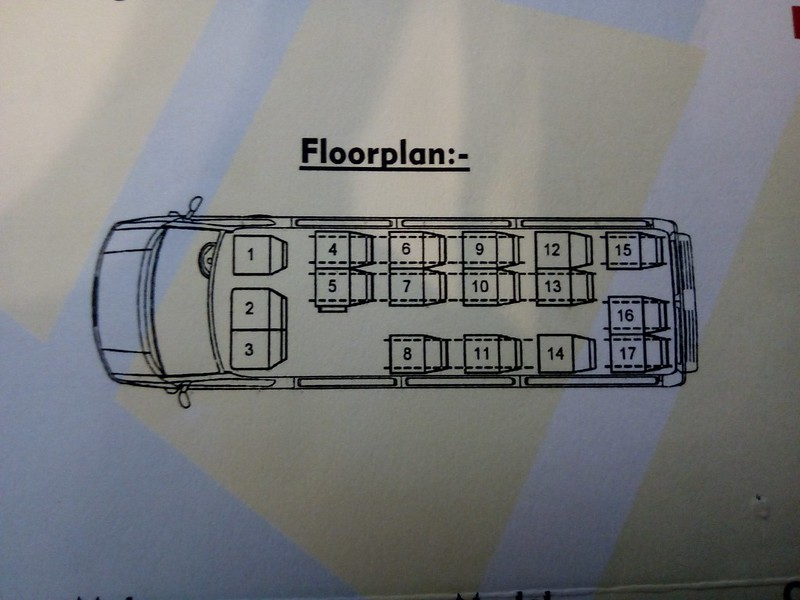 Original Floor Plan Original Floor Plan by David, on Flickr With all seat behind the cab on Unwin rails apart from two that sat over the wheel arches. The seats themselves are worth nothing second-hand unless you get really lucky with someone happening to want one, so I stripped them all down and put the rail clamps and seatbelts on eBay. Seatbelts are selling occasionally for £7.50 a go, and the unwin rails sold quickly at £15 a pair, including 7 pairs which went to Iceland, with the buyer more then happy to pay £145 postage The lovely shoolkids the minibus carried when in service lefts lots of presents, such as chewing gum, sticky sweet wrappers, etc, so quite a clean up needed :bad: Did a first-pass clean to get rid of the general rubbish and dirt at the rear, but will need to revisit that again once the back is empty and ready to convert. Concentrated on the cab mainly once most of the seat frames were dumped at the council depot Bought another single seat base as fitting a pair of swivel seats in the front. The Passenger bases are pretty expensive even second-hand, and many people buy LHD Drivers Bases from eBay.de to save some money. I actually just bought a standard RHD Drivers Base from a Sprinter and adapted that by drilling a couple of extra holes in a rear mounting bracket. Also smartened up the bases, which were quite tired and knocked around Before: 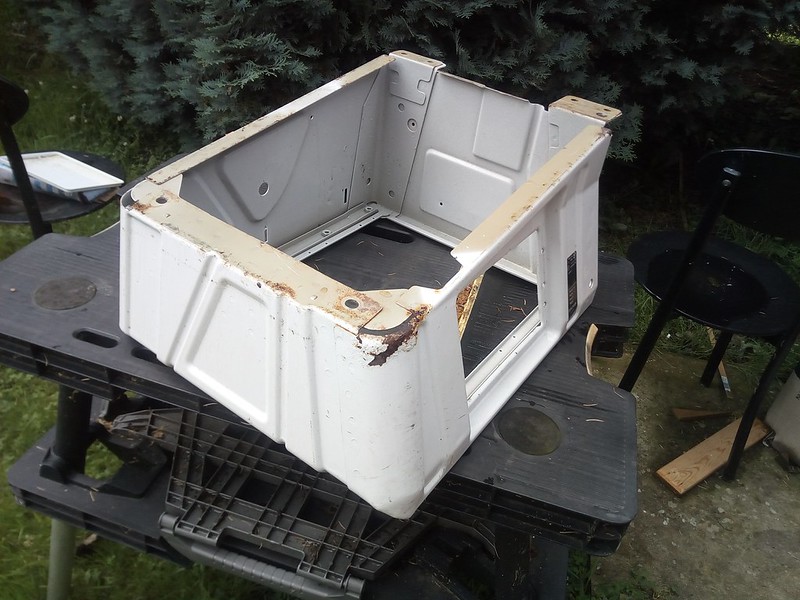 Sprinter Drivers Base Sprinter Drivers Base by David, on Flickr 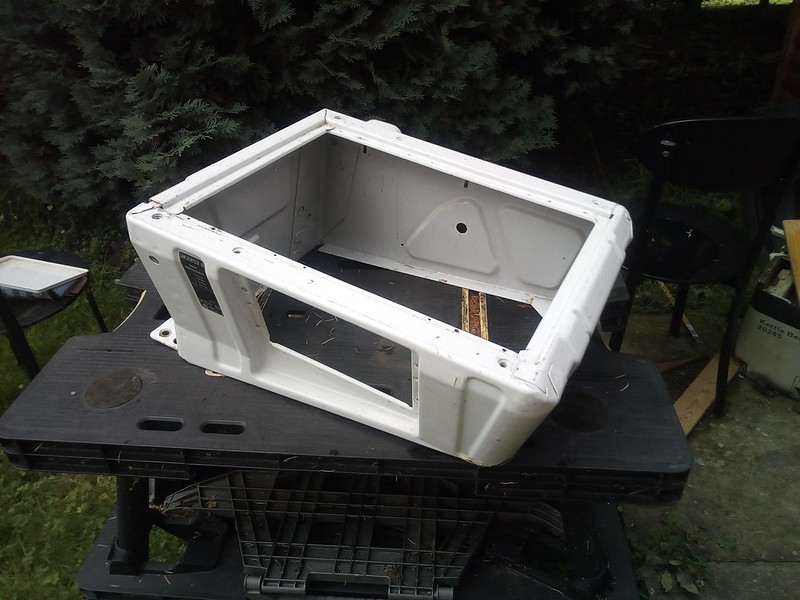 LT Drivers Base LT Drivers Base by David, on Flickr Resprayed in Anthracite (colour chosen as happened to have this already in a pot. I like the colour as well) 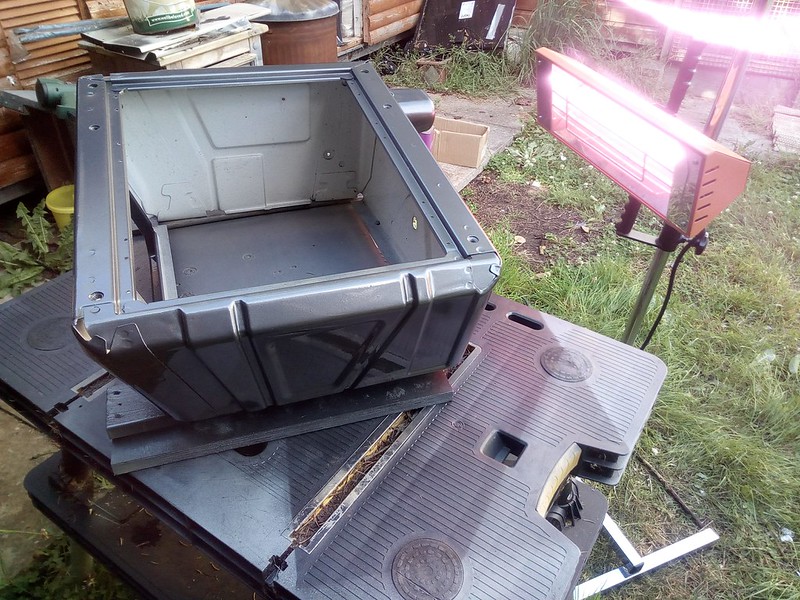 Respraying Base - 1 Respraying Base - 1 by David, on Flickr 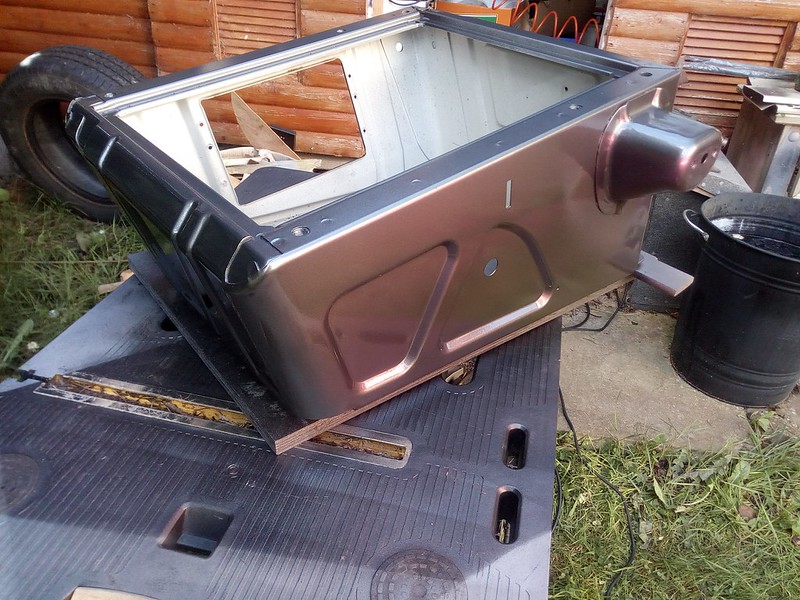 Respraying Base - 2 Respraying Base - 2 by David, on Flickr And Clearcoated and left to cure (don't really need a shiny finish, but the paint was waterbased, so needed a top clearcoat to protect) 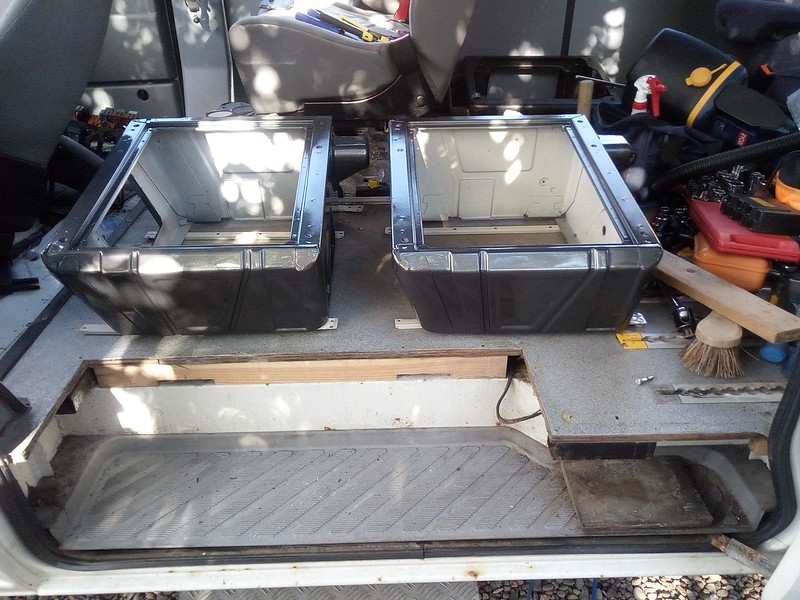 Resprayed Bases curing Resprayed Bases curing by David, on Flickr The cab was pretty mucky as well, so stripped out the lower trim and mat and gave it a good clean 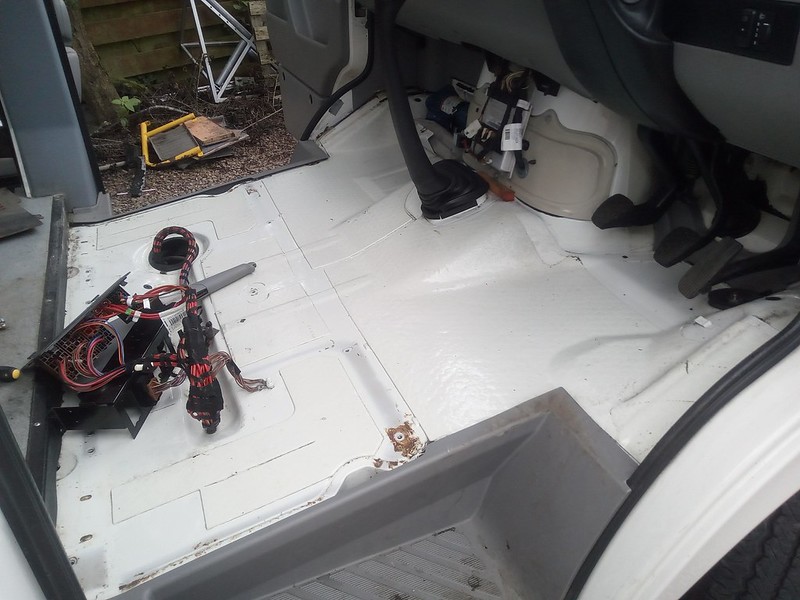 Cab Stripped Cab Stripped by David, on Flickr Trim back - G101 did a good job on this And Mat Back - this was a bit tougher as likely the first time it had a wash in 14 years :rolleyes: But using some strong wheel cleaner, and then my Autosmart Vortex Pressure Cleaner, it came out not looking bad 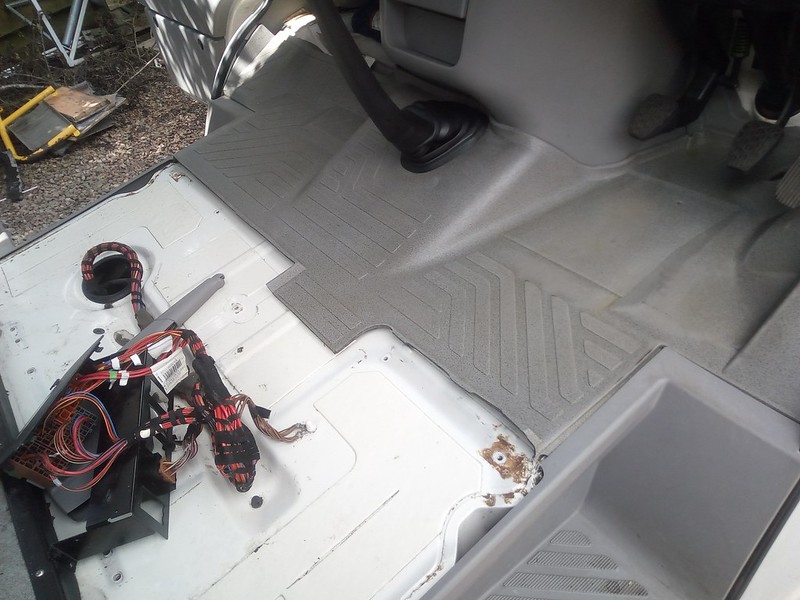 Trim and Mat Refitted Trim and Mat Refitted by David, on Flickr Not looking new by any means, but it has zero dirt left on it And then the freshly painted seat bases get bolted down and handbrake reattached  Seat Bases Refitted Seat Bases Refitted by David, on Flickr Need to make one (maybe two?) top covers for the seat base tops to stop debris falling in and protect whatever may be inside - typically electrics. I will be using the passenger side to install things that are needed but you want out the way, so Split-Charge unit, Battery Charger, Inverter etc. On the Drivers side I will likely be installing a Eberspacher Diesel Heater, same as the one in my T5 (possibly even just removing it from the T5 and transferring it!). Also need to get a new mat sorted out as area between the seat is now bare metal (as was previously covered by the double seat base), but not urgent on that. So got the cab pretty well sorted apart from a nice floor mat  My pair of Ford Galaxy Seats installed, both with Swivels and Inner Comfort Armrests, and the drivers with seat height and lumber support adjustments.  Cab Seating Sorted Cab Seating Sorted by David, on Flickr These are in very nice condition and am very pleased with them Drivers Seat in backwards mode. 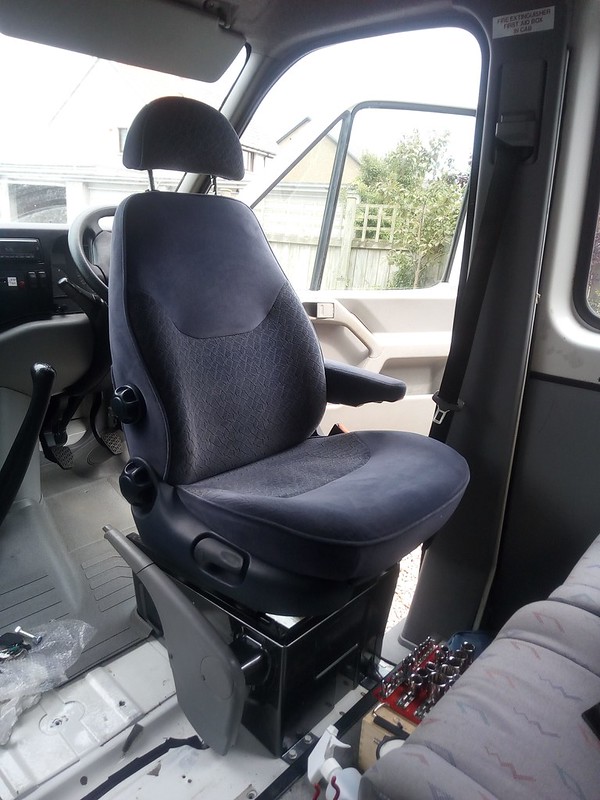 Drivers Swivelled Drivers Swivelled by David, on Flickr This is a bit of a fiddle to turn round with the size and position of the steering wheel, so it is part-rorate, adjust seat back (I do tend to lean back due to orang-utang arms), slide seat, rotate some more ... I can't see myself doing this unless stopping for a while, as opposed to just stopping for a cuppa Passenger Seat in backwards mode.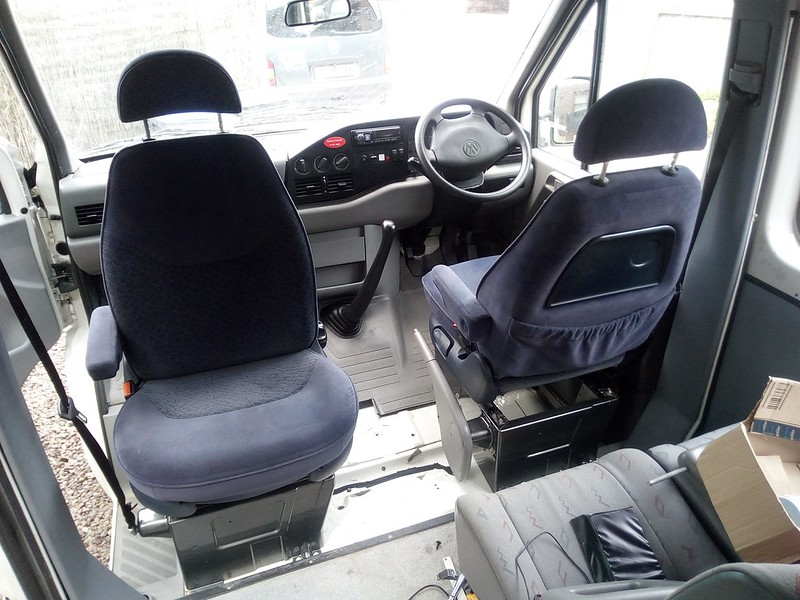 Passenger Swivelled Passenger Swivelled by David, on Flickr This was a lot easier turning this one with no wheel to have to manoeuvre around. Just pull the swivel lever and spin it around  Now both of these still rotate outwards. I have yet to investigate deeper about removing the lugs that prevent inwards turning as there is a concern about compomising belt retainer strength if removing the lug and on initial inspection when I first got the seats, I agree with, so I will see if it annoys me enough to modify (safely!) as it would be better if they turned inward, so they can be turned in towards each other a bit which would make a centre table more 'friendly' Even with that slight glitch, fitting the two singles (and passenger base to suit) meant the total cost of the change from the basic standard 2+1 seats to these ones being just £152 for seats and a base, plus 42 pence for washers to install
Oh, something I added a week or so ago .... nice bit of entertainment in the form of an Alpine Radio with CD/BT/USB and iPod & Android connectivity:  LT-Alpine LT-Alpine by David, on Flickr Head Unit that I originally bought for my VW T4, but took out when I sold in case it might be handy again  The two things below the radio ... USB port for the radio. Ideal for just popping in a little memory stick 3-Way Switch. This allows you to have the radio come on and off with the Ignition key like normal, or have the radio always on, bypassing the ignition switch. Dead handy for a campervan and I have sold loads of those to VW Campervan owners. They will work on other brands of vehicle of course :s_cool Also got a great pair of Alpine dash speakers due to arrive on Saturday (bought from Amazon on "Prime Day" so saved a bundle on those) to complete the picture 
|
|
|
|
Post by Hoovie on Feb 8, 2018 20:29:19 GMT
Exterior Change IdeasOK, time to canvess opinion (and not about my "photoshopping" ability please ) This is my base vehicle as it stands now: 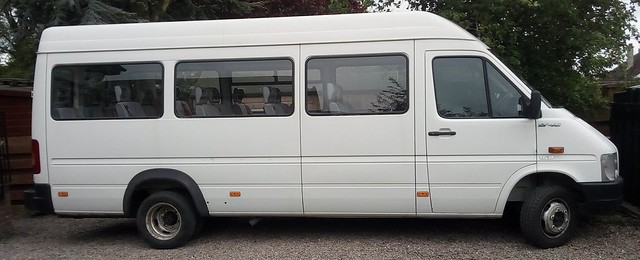 LT - Standard LT - Standard by David, on Flickr I intend to get the windows (currently totally clear) tinted for the purposes of Privacy, Temperature Reduction and Appearance. The guy I use is top drawer and the cost of doing this, including the windows all taken out, tinted and refitted will be £300, which I am happy with (I could remove the windows myself, hand over for tinting, and then refit afterwards for £220, but the extra £80 for it to all be done by them is well worth it I think ) Now while the windows are out, I can deal with some of the slight surface rusting around the frame cutouts, and looking for opinions of what style to go for when I fix that... Version 1: pretty well just the window tint, and the immediate surround sorted out. 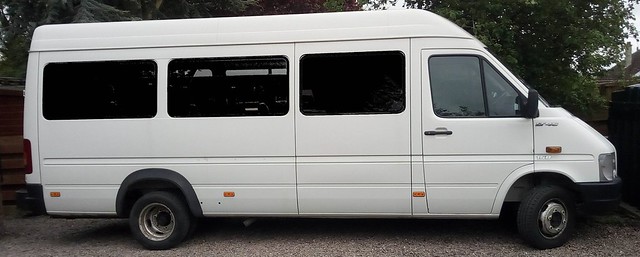 LT - Tinted, Frame Painted Version 1 LT - Tinted, Frame Painted Version 1 by David, on Flickr Version 2: continue the black to join the two rear window panels together, following the inset seam already on the side. 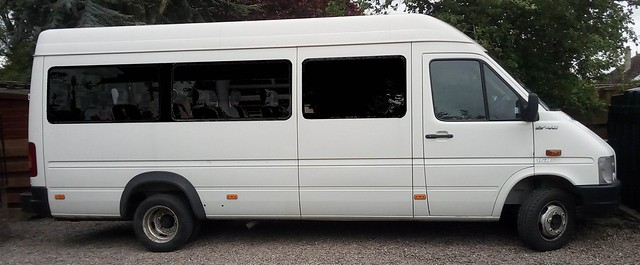 LT - Tinted, Frame Painted Version 2 LT - Tinted, Frame Painted Version 2 by David, on Flickr and Finally Version 3. join all 3 side window panels together to make the appearence of a continuous section. 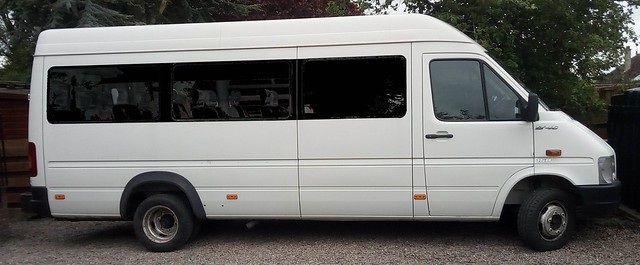 LT - Tinted, Frame Painted Version 3 LT - Tinted, Frame Painted Version 3 by David, on Flickr I did a similar thing with the T4 and that made it look a lot more modern (albeit with new windows as well) Before: 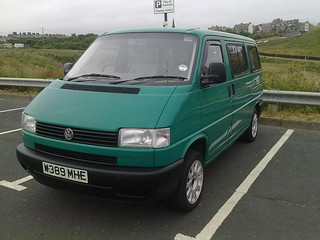 Original Original by David, on Flickr After:  Blacked out Blacked out by David, on Flickr But the LT is a significantly larger vehicle, so thought I would get others options and suggestions before laying down any paint! Also, I am liking the idea of a blacked out lower section between the bumpers as shown below. 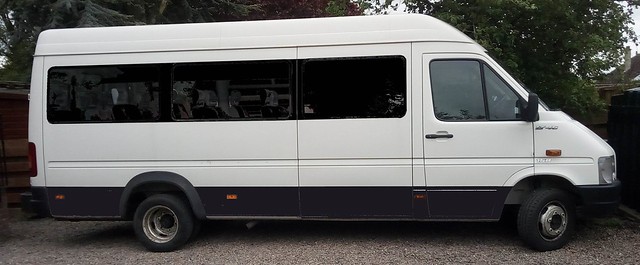 LT - Tinted, Frame Painted Version 3 & Lower Panel Blacked Out LT - Tinted, Frame Painted Version 3 & Lower Panel Blacked Out by David, on Flickr This I think would look quite good with the rear wheel arch extensions (and maybe repeating a similar 'pseudo-extension' paint effect around the front arch as well?), as I am planning on a bit of an 'off-road' look (exact details to be revealed at a later time  ) Thoughts on this one as well? Aftermarket windows nowadays tend to come with the option of coloured tint rather then film :s_thumbsup Given the choice, I would have that (and that is what I bought for the T4), but at £300+ per window for new glass, not an option here The tint being proposed is "limo tint", which is 5% light passing. It sounds tiny, but from the inside-out it is just like looking though sunglasses (but outside-in, more like the Roy Orbisons). I am drawn to the all-black look - that is what the current generations of standard vans tend to look like when fitted with factory windows. I think it will tie in nicely with the (to be revealed) upper effect  - think if it included chunky side rubbing strips (not sure it available as a factory option?) it would tie in well. Here is a video of a lower black painted effect which I think works really well ... Had a thought about the lower section, and thought this might look better ... LT - Tinted, Frame Painted Version 3 & Smaller Lower Panel Blacked Out by David, on Flickr The top matches a crease on the lower panelling and a step on the bumpers, so it still ties in and flows. Plus maybe painting around the front arch for an extension effect (similar idea to the van in the youtube video). Oh, on the passenger side there is a large rubber section forward of the rear arch (a sort of guide for the slider) and that is by the two black plugs you see on this side (they are there to accept the guide when there is a door fitted on the side shown in the photo) (PS. Ignore the colours. they would all tie up. hopefully!) UPDATED SECTIONSo following on from the post above, I am having to do this in stages (not quite how I planned it but will explain later in the post), so I have gone from the look in Picture 1 to the look in Version 1 (Picture 2) 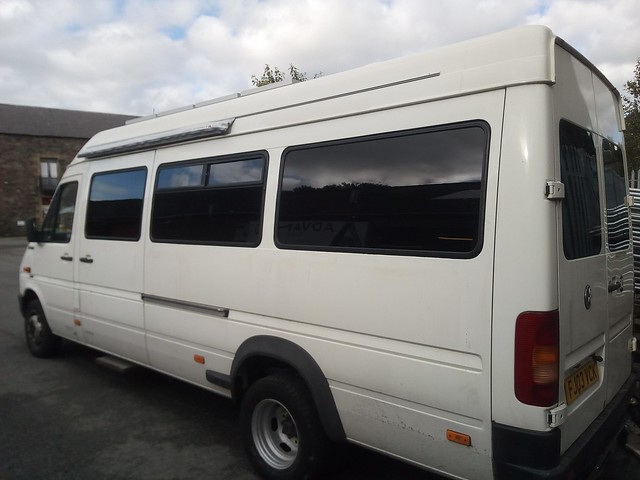 Post-Tint Post-Tint by David, on Flickr I will within the next 10 days (and hopefully this weekend) get the the windows to look like version 3 (Picture 4) Why not all in one go while windows out? that is the sensible thing to do. Well, when the windows came out I was presented with this kind of thing! 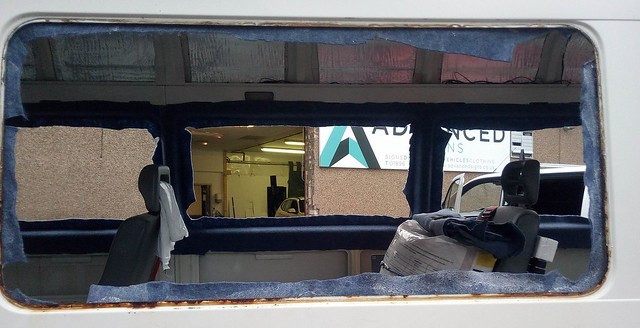 NSM - Window Out NSM - Window Out by David, on Flickr This is actually pretty typical but not something I really expected even so :rolleyes: But obviously I had to deal with this before doing cosmetic painting, so had to spend quite a few hours while the windows were out cleaning up the loose and flaking rust, applying Hammerite Krust to stabilise the rusty metal frame, and then apply some paint to protect the Krust. So all the time that I expected to have to do the painting was eaten up by the repair work  The windows had to go back as the company doing the window tinting only allowed so much time for the vehicle to be stored, and I couldn't take it home without windows or risk leaving out for both weather and security reasons, so had to bite the bullet and work out what to do. So I hand painted black (sprayed the aerosol into a lid and then used a brush there) around the frames making sure I went past where the rubber seals stopped. So when I come to finishing off, I will be able to mask off the seals on the inside, mask off the outer edge and then spray to get to Version 3. Not ideal, but the end result should be acceptable - and at least I have staved off that rust for a bit longer! UPDATED SECTIONAnd now painted to get to version 3 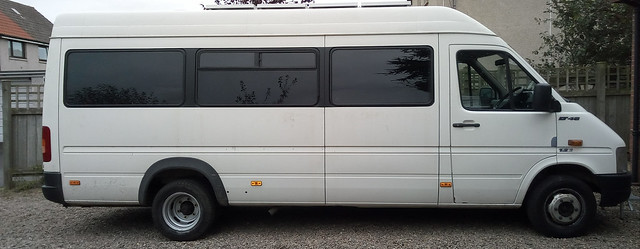 V3 V3 by David, on Flickr It really would have been much much easier to do this with the windows out, but it is what it is, and while if this was a brand or nearly-new van, I would have done it differently, (and would have cost more money), I think this looks ok 
|
|
|
|
Post by Hoovie on Feb 8, 2018 20:30:18 GMT
Cleaning the RoofDid some measuring today to see what is going to fit in the new conversion :s_cool Think it should be nice and roomy  Also will be fitting stuff on the roof, but before that, I think it might need a clean! This is typical of the whole roof ...  LT - Dirty LT - Dirty by David, on Flickr I am not sure if the roof has ever been cleaned! I had snowfoamed the entire vehicle including the roof a couple of weeks ago and then power-washed, but that made no impression on the roof at all. So today, as it looked like a dryish day (unlike every other day in the last fortnight) it was time to tackle it as I couldn't even think of fitting anything on top of this level of filthyness! Normal Car Shampoo cleaned generally ok but made very little impression on all those small hard black spots that are totally covering the roof. No idea what they are. possibly fruit tree droppings that have been baked hard in the sun maybe? pure guess, but no real clue. So brought 3 more products up to the roof to try (all Autosmart products) ... Fallout Remover - didn't expect that to much, but it was possible it might suit whatever was on the roof; SmartWheels - An strongish Alkaline cleaner that usually works on most things but is fairly aggressive so must be rinsed off pretty quickly after use; and finally G101 - Excellent general purpose cleaner which tends to work on just about everything. So Fallout Remover? as expected, did nothing in this instance. Smartwheels? It cleaned generally but didn't do the black spots; That left G101 to try. This is what G101 managed ... 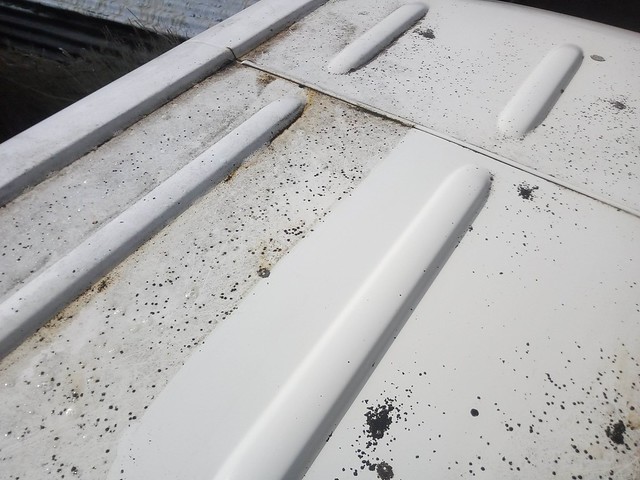 LT - BeforeAfter Closeup LT - BeforeAfter Closeup by David, on Flickr As always, G101 comes through for me :s_yahoo Not quite a matter of spraying on and just wiping off, but with a little bit of elbow grease, the result is a properly clean roof and very pleased to see no effect on the paintwork from those black marks (so probably not fruit based?). After about an hour on top of the van, got to this stage ...  LT - BeforeAfter Full LT - BeforeAfter Full by David, on Flickr Rain came on as I was just doing the bit above the windscreen. Carried on but getting harder to do as the rain was washing off the G101 before it had time to dwell and then heavens really opened up and time to abandon van before I got washed off the roof! Back half to finish hopefully tomorrow morning weather permitting, including the sides above the gutter rail and then another wash with normal shampoo and a rinse and towel off. then a layer of Colinite 476 to help protect on the roof top (extra protection will be good as I doubt I will be doing the roof everytime I do the sides :rolleyes: ). I do have some surface rust to deal with on the gutters so no waxing there until sorted. Oh, on the right of the last pic you see a ladder ... this is one of those telescopic ladders which I have always been a bit wary of but I needed a ladder that could reach the roof and also I could carry with me in case I needed to access the roof when out and about (given I will have various "things" up there), so I bit the bullet and got one off Amazon. I choose one with the medium kind of height (which is right for my needs) and the best level of review feedback. And it works great :s_thumbsup (just thought I would mention this in case anyone had similar thoughts and reservations about these ladders) Everytime I go out to finish the job, it starts to flipping rain! I did manage to get halfway though the rear section, so nearly there. I am intrigued by these black spots though :s_scratchhead The general dirt and grime cleans off easily, but the black spots stay until I give them a good going with G101 and a cloth, and once gone, paintwork below is fine. Here is the last section I have yet to finish, but what I did is gave it a general wash, so it looks clean now APART FROM THE BLACK SPOTS, which haven't shifted. anyone think what this could be from? covered the entire roof top just like below. 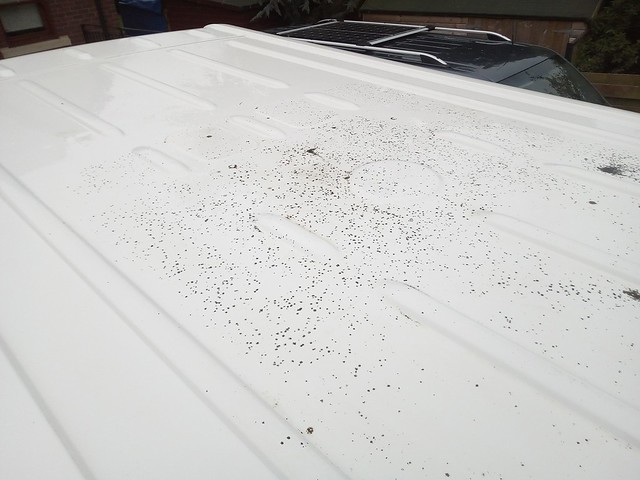 LT - Roof Speckles - Wide LT - Roof Speckles - Wide by David, on Flickr Closer View 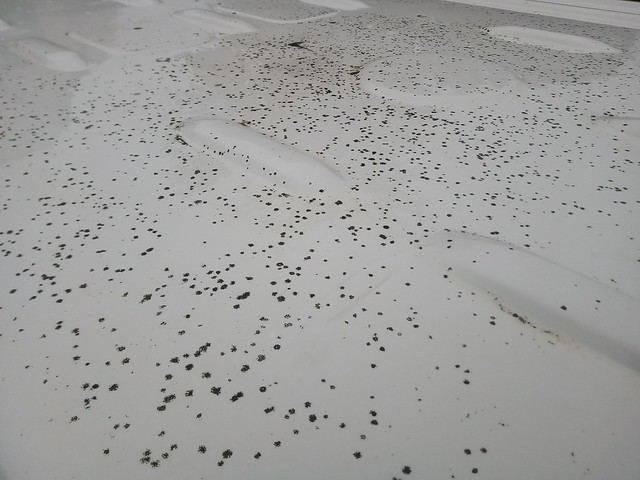 Roof Speckles Roof Speckles by David, on Flickr Well, sorted now  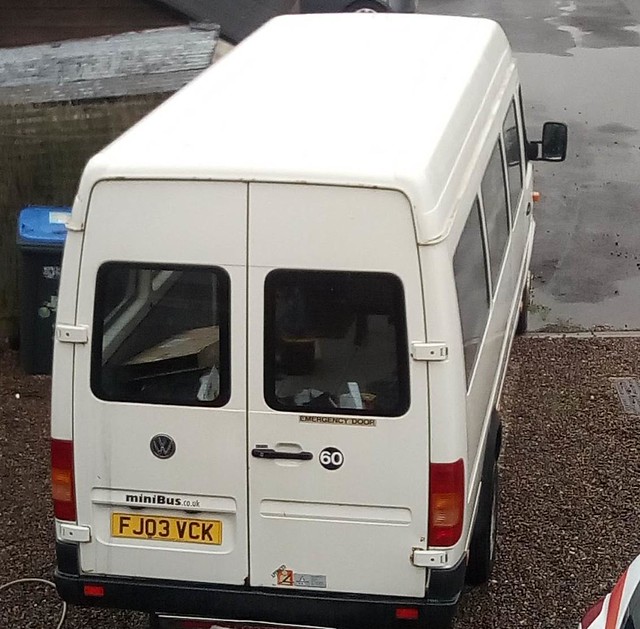 LT - Clean Roof LT - Clean Roof by David, on Flickr Well, still need to wash the sides firmly down to the gutters, but no need to get back on the roof for cleaning 
|
|
|
|
Post by Hoovie on Feb 8, 2018 20:31:16 GMT
Service Time
The Minibus has been sitting around for a couple of years with the only trips being a drive into a barn for winter storage and a drive to a testing facility for its annual PSV checks (it was bought for a school contract that didn't come off).
So mechanically, I need to get everything up to scratch and fresh, so on the cards is:
Oil and Oil Filter Change
Fuel Filter
Pollen/Cabin Filter
Possibly coolant? - need to check if it is long-life stuff or not, but might be worth doing anyway
New Brakes Discs and Pads all round
New Brake Fluid
Been quoted £684 parts and labour by a local garage for that lot (excluding coolant as never thought of that when asked for quote) with a "power flush"
They also quoted me £270 for just labour if I supply all the parts, which is a bit more reasonable, as I can get all the parts (genuine VW as well) for around £265 using a contact at VWs TPS outlet on their "Family & Friends" scheme, so would be below trade price, so total cost there £535, but if I wanted a engine flush it would be extra.
UPDATED POST
So van booked in for a service start of October ...
The previous list was:
Oil and Oil Filter Change
Fuel Filter
Pollen/Cabin Filter
Possibly coolant? - need to check if it is long-life stuff or not, but might be worth doing anyway
New Brakes Discs and Pads all round
New Brake Fluid
Going to get the same stuff done, but with the exception of the Brake Discs and Pads as they are ended up looking really clean and in excellent condition.
Total cost of Filters (Oil, Air, Fuel and Pollen), 5L of LongLife Antifreeze and 10L of Quantum Platinum 5W40 Fully Synthetic oil came in at under £100, which seems pretty good. Need to add brake fluid to the list but I have that already and the Engine flush stuff (garage will supply that).
Without the Brake work, labour should be right down so hopefully looking at under £250 cost all in :s_thumbsup
UPDATED POST
So got the truck back today from the service work.
While being serviced I also asked them to check the Rear Diff oil and Gearbox Oil - both had a clean bill of health (the mileage is pretty low - just 77,000 miles for a 14 year old van, so that helps I guess). I did get the Coolant replaced (bought from VWs TPS company).
Once service was done, the mechanic took it for a road test and a brake pipe failed :shok: guess one of those things, and better to happen then rather then when I am driving along the motorway and braking :rolleyes: So that delayed things while that was fixed and added a bit to the end bill. But including whatever time that added to the cost, plus a tenner for a replacment pipe, invoice from the garage was just over £300. So including parts I supplied, £400 for a major service and a minor repair is pretty acceptable I think :Y
Also feedback from garage is the vehicle is in very good nick mechanically and is really clean underneath, so that is great news as well
|
|
|
|
Post by Hoovie on Feb 8, 2018 20:32:07 GMT
Installing Roof FanSo now Summer is officially over, time to use the good weather to work on the outside  Todays job: Roof Fan! This fan was in my virtual shopping basket even before I bought the LT, as my experience of my T4 and T5 campers were that they got very hot in mildly warm weather, so I wanted to resolve that with the LT Camperbus  This is going to be a bit of how-to, or at least a "how I did it" thread, so lots of stage by stage photos and waffle, but you can skip to the end for a summary  Step 1: Remove the ceiling panels I have an LT Minibus, which means full front to back molded panels on the ceiling. going to be keeping these, so removed them carefully (actually a pretty simple job to reveal the roof 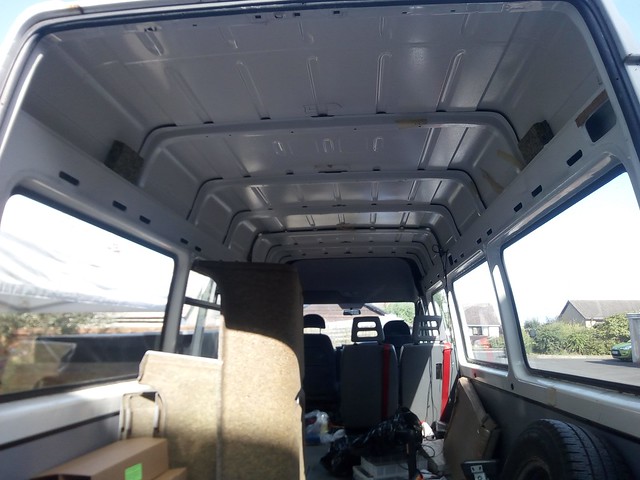 Ceiling Down Ceiling Down by David, on Flickr Step 2: Choose location of fan There are two 'easy' locations for a fan on an LT Van, one at the front and one at the rear. When I say "easy" I mean locations which avoid the raised ribs and internal beams. I went for the rear option as I have no opening windows at the back and want ventilation by the rear fixed bed. 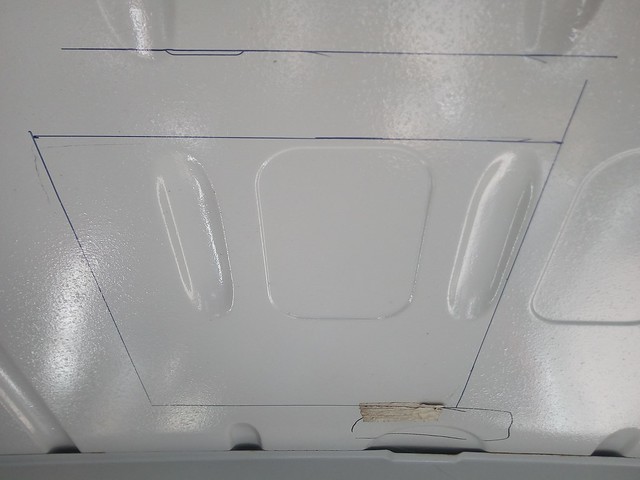 Hole to Cut Hole to Cut by David, on Flickr I located the position by offering up the fan support and working out where it would best avoid any bumps on the roof. This fan requires a 400x400 hole, and the support is another 40mm or so futher around all sides. 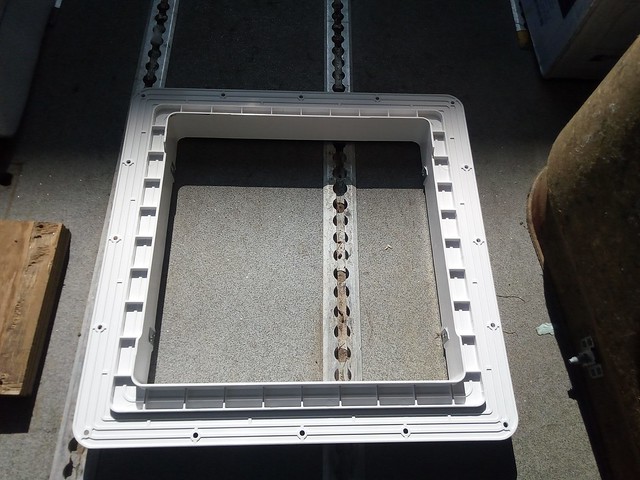 Mount to Fit Mount to Fit by David, on Flickr I managed to avoid all ribs and raised parts except at the front where there is the rib drop part that just sneaks under the support piece  But best option possible. I also elected to offset the fan for maximum effect once my layout is done Step 3: Cutting the hole! Once marked out, measured, checked, remeasured, rechecked, and measured again, time to cut! Drilled a hole large enough for the jigsaw blade 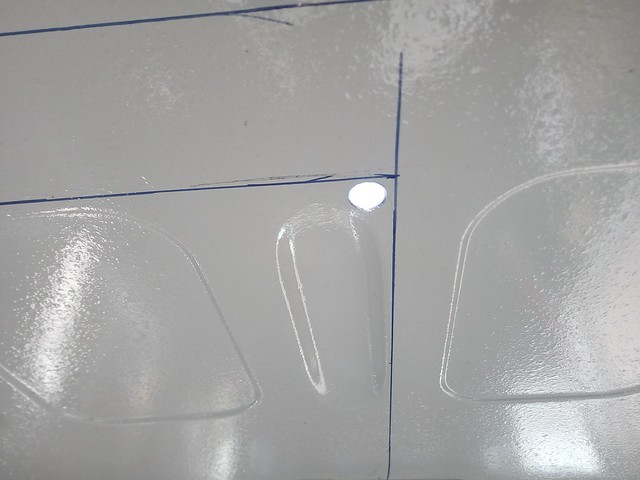 Nearly to Late Nearly to Late by David, on Flickr Nearly the point of no return. Definately the point of no return now! 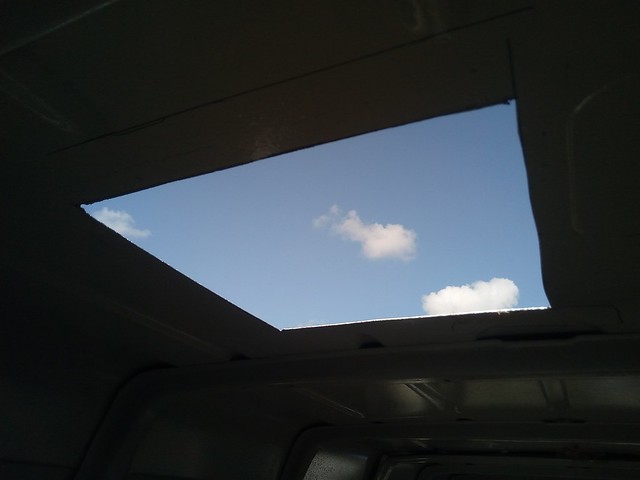 No Going Back Now! No Going Back Now! by David, on Flickr The right cut I made from inside, but I did the others outside and were much straighter  Support dropped in and checked for fit 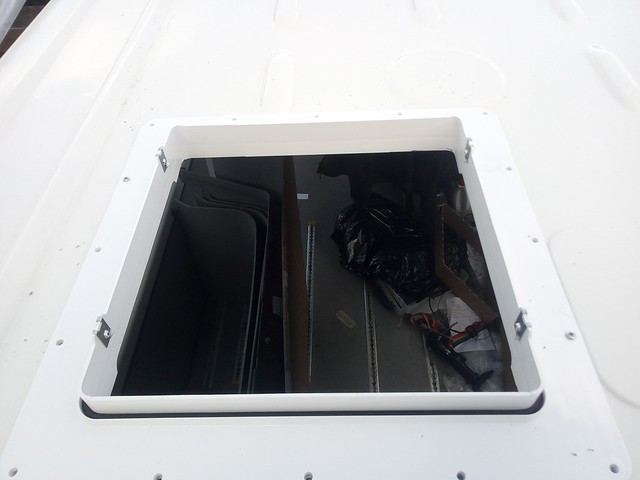 Offered in Offered in by David, on Flickr I drilled a couple of holes and fitted screws to keep the support in place, and then drilled the rest of the holes 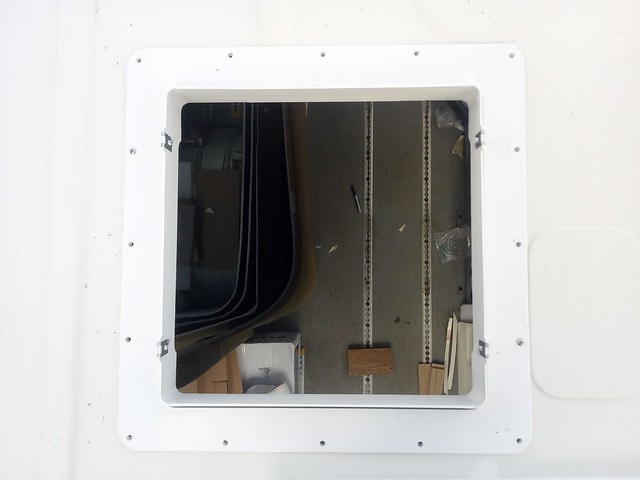 Holes Drilled Holes Drilled by David, on Flickr Once all holes drilled, cleaned up the jigsaw cuts with a file and applied some red oxide primer to the cuts and all the holes 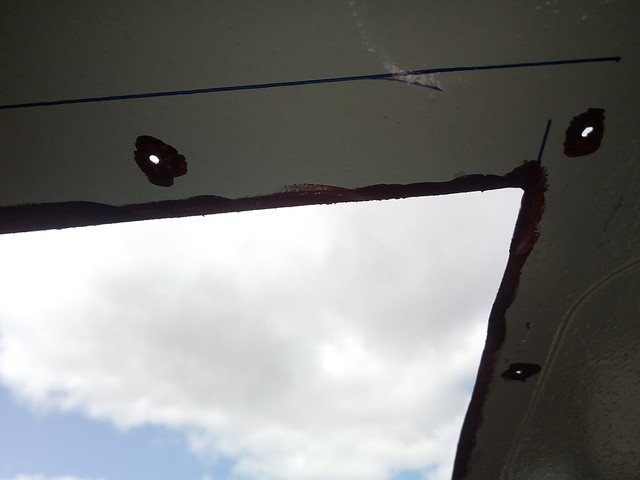 Primed Primed by David, on Flickr Step 4: Ceiling Trim hole Put back the ceiling panel inside and the worked from the top to get the hole in the right place. So as it looks initially 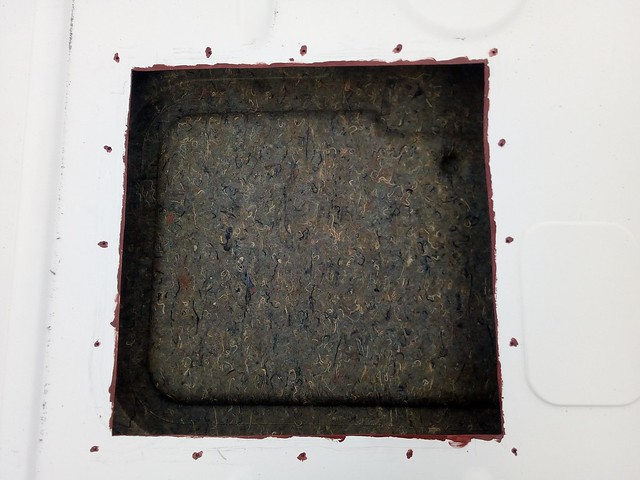 Ready to Cut Ready to Cut by David, on Flickr Put the internal garnish piece in to get the square shape 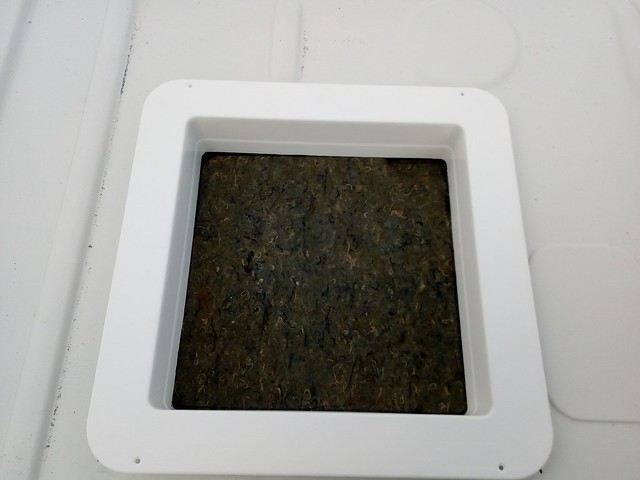 Positioning Positioning by David, on Flickr Marked up with a Sharpie 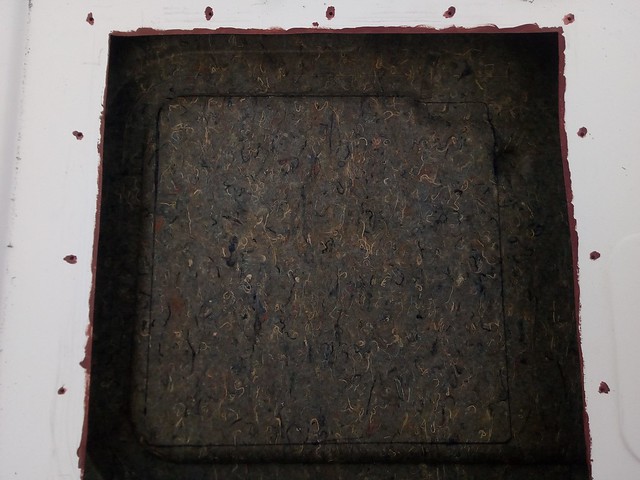 Marking up Marking up by David, on Flickr And cut the hole 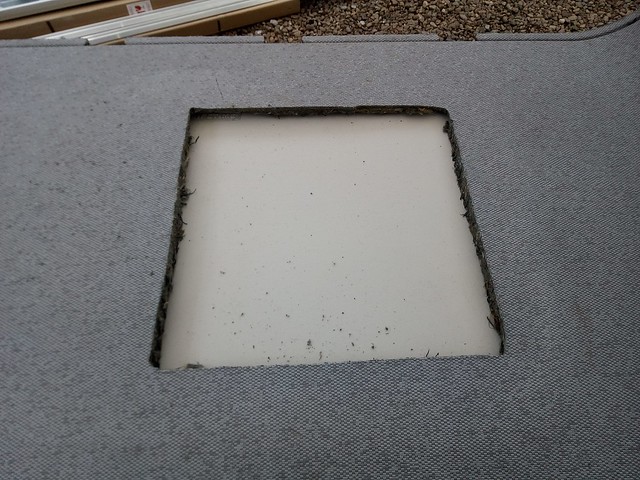 Ceiling Hole Ceiling Hole by David, on Flickr Need to make the hole a little larger then the size marked to give some movement when fitting, but not too much. Step 5: Fitting the Fan This fan is very nice in the way it comes with a support that is fitted to the roof, and then the fan unit itself is mounted on the support. makes it very easy to remove for mainteance or repairs withiout disturbing the mount itself. So first part is securing the support mount  Screwed Down Screwed Down by David, on Flickr This is screwed down as you can see at regular intervals to push tightly to the roof. What I forgot to take a photo of is the application of Butyl Tape underneath to form a waterproof bond between mount and roof. Butyl tape is like putty on a roll and is a very clean way to do this. This is just a wider angle showing where the fan is in relation to the van roof 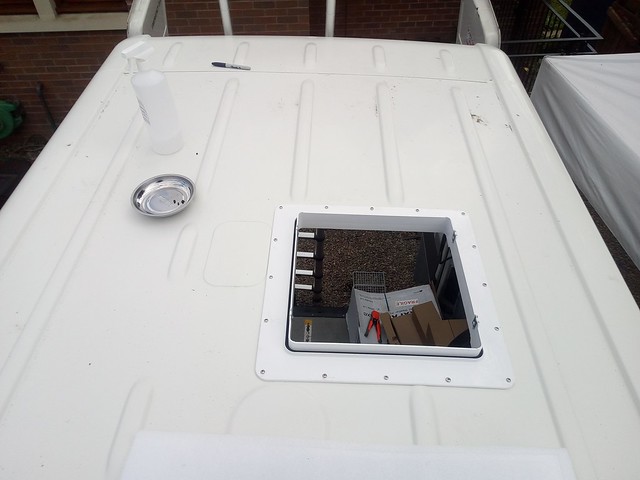 Wider View Wider View by David, on Flickr (and no, that isn't the dogs bowl you can see  ) Once the screws were all secured down tight, applied some Sikaflex all around the edge and on top of all screw heads 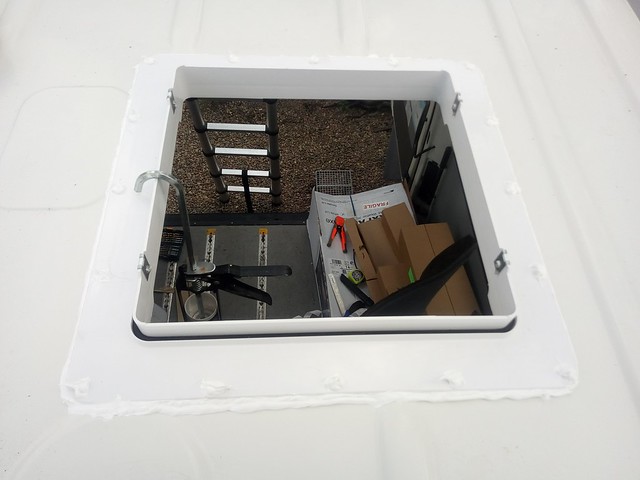 All Sealed All Sealed by David, on Flickr I am expecting the tape plus the sikaflex together to mean NO water ingress at all It is a bit messy, but I don't think there is much you can do to get a tidy sikaflex application :s_scratchhead 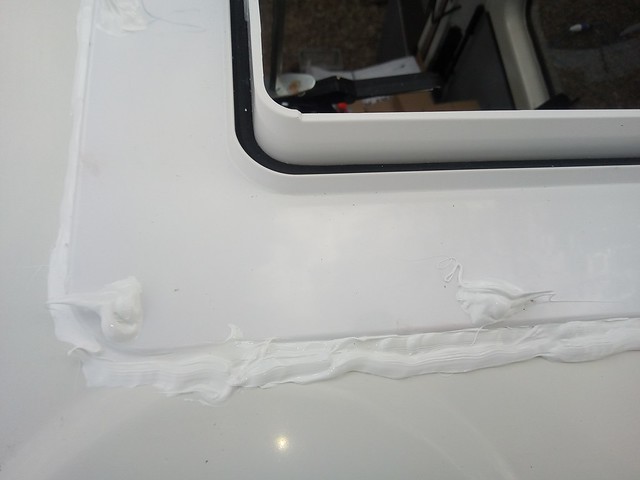 Sikaflex Sikaflex by David, on Flickr This shot also shows nicely how the water ingress protection system works ... there is a raised part on the support, then a rubber gasket the fan housing pushes down on, and then a much higher raised part. There is no way water can get past that lot! And finally the fan itself mounted on the support. This is what it looks like from underneath without the inside trim garnish in place 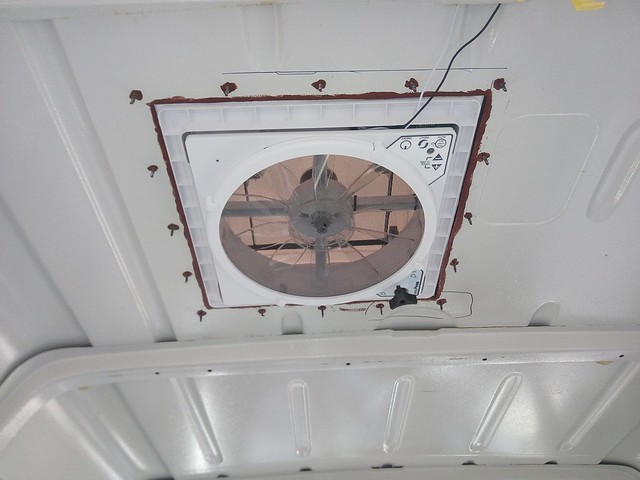 Fan Fitted - Waiting Garnish Fan Fitted - Waiting Garnish by David, on Flickr And the fan from the outside 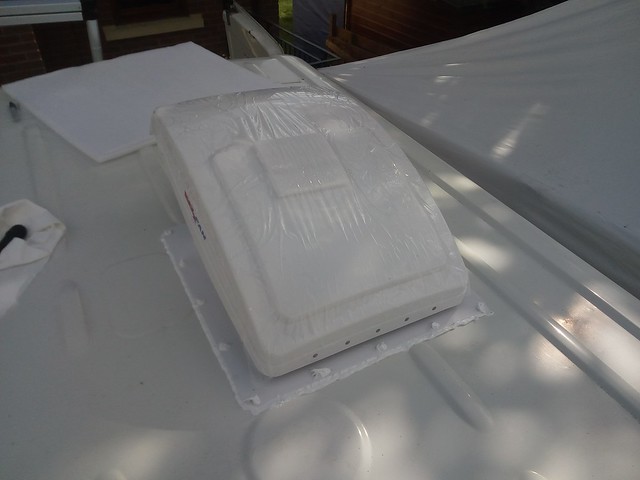 Finished outside Finished outside by David, on Flickr And a shot from the other side 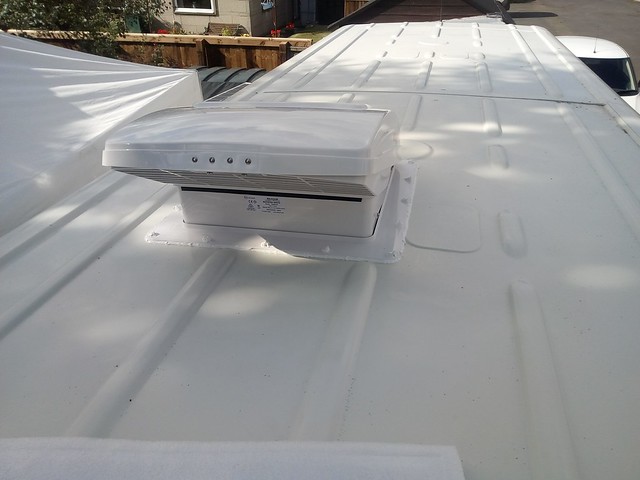 Fan from Rear Fan from Rear by David, on Flickr These last photos show the fan with the vent cover open. the cover is a substantial item and is designed to allow the fan to be used in any amount of rain and also when driving (these last two points were some of key reasons to my decision to buy this particular fan) And finally the roof showing where the fan is (now in closed position) 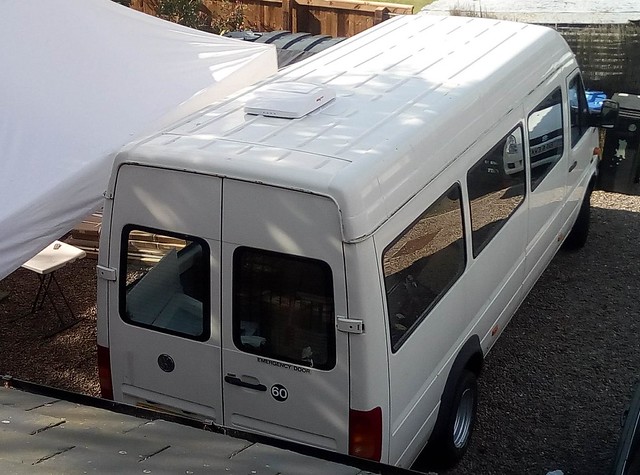 Roof Roof by David, on Flickr Summary This fan is the MaxxAir Maxxfan Deluxe 7500 and I think is probably the best roof fan you can possibly get on a campervan or motorhome without going into full-blown Air Conditioner units. Because I want to be able to camp off-grid and be self-contained, mains hookup and generators were non-starters, and there are no AC units that will work for any useful length of time off even a extremely large battery bank. What makes the Maxxfan Deluxe as good as I claim? Well, it has a manual mode of course, but you can also operate it in an automatic mode, where it knows the the interior temperature of the vehicle; you set the desired temperature you would like it to be, and the fan will operate intelligently to try to achieve that. The larger the temp gap, the faster the fan will operate, and as the target temp gets closer to the actual temp, the fan will slow down to a lower speed (it has a total of 10 speeds). and once the temp is achieved, the fan will stop and if cooler then target, the lid will close - all automatic! At the lowest speeds, you really cannot hear the fan (maybe in the dead of night you might?) and this will make it great for just general fresh air ventilation overnight as well. What is also really good is that it will do all this unattended as well. So if you leave your camper to go off for the day and it starts to get hot inside, the roof vent will open and the fan will automatically start running (and being rain-proof, doesn't matter if it starts to rain either  ). So you don't come back to a sweltering campervan and have to fling all the doors open to try and cool it down, it is right for you when you get back :cool: Obviously it can really only cool to the exterior ambient temperature, but usually that is all you need - I was getting my T5 inside running at above 40c sometimes as it warmed up in the day and nowhere for the hot air to go! If you do get a bit smart however, you could say stick a bag of ice near the fan, set it to blow in (you can choose blowing in OR blowing out at all speeds) and that will give you some nice chilled air! :s_cool There are a number of models of this fan, but I opted for the top-line Automatic one with the remote control 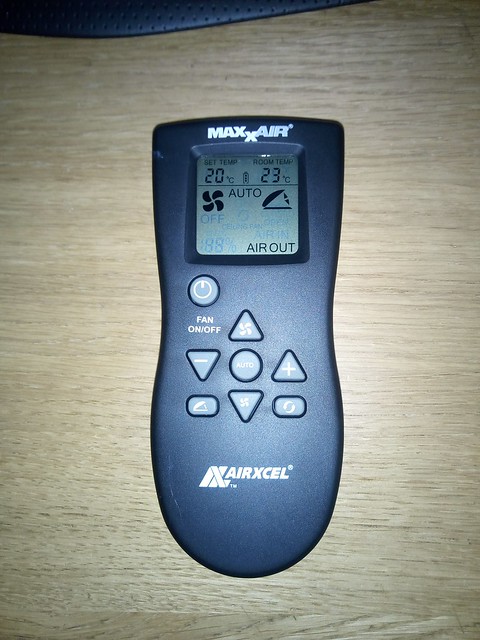 Fan Remote Fan Remote by David, on Flickr Price wise it is not cheap by any means, but you don't get features like this and quality like this for pennies. Could have had 5 or 6 basic fiamma caravan vents for the same money for example, but pound-for-pound, even at the price it is, this is the best value fan in my opinion. Oh, and I mentioned the rain and driving points. Rain ... I live in Scotland. 'nuff said! Driving... My LT has no Cab A/C, so I can use this to help cool the interior with some forced air exhaustion, possibly in conjunction with an Eberspacher D2 Airtronic in fan mode for maximum circulation.
|
|
|
|
Post by Hoovie on Feb 8, 2018 20:33:37 GMT
Solar (PV) Panel InstallationGetting ready to do the tracking for the solar, but become slightly more complicated then I expected :rolleyes: This is a picture of my T5 with a pair of solar panels... 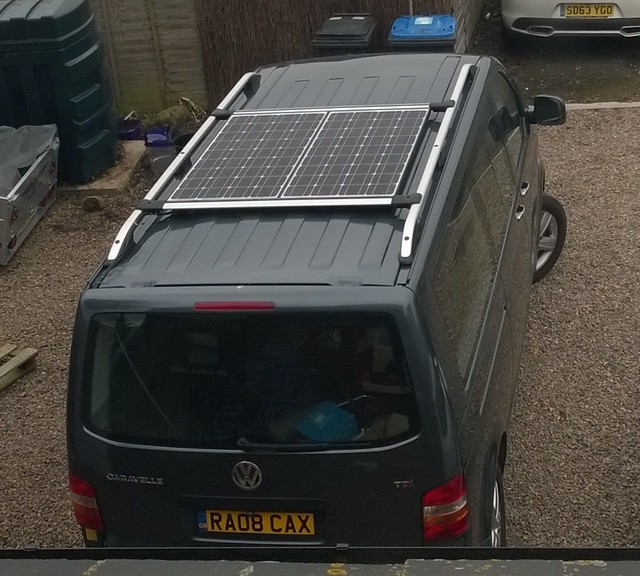 Solar Array Solar Array by David, on Flickr Now these panels are 1200 x 540 in size, so in this picture, the span across is 1080mm. It would have been very easy to fit them across within the space between the roof rails as well. On the LT, I am planning on having the panels across. This is how one looks (taken before Fan Fitted)... 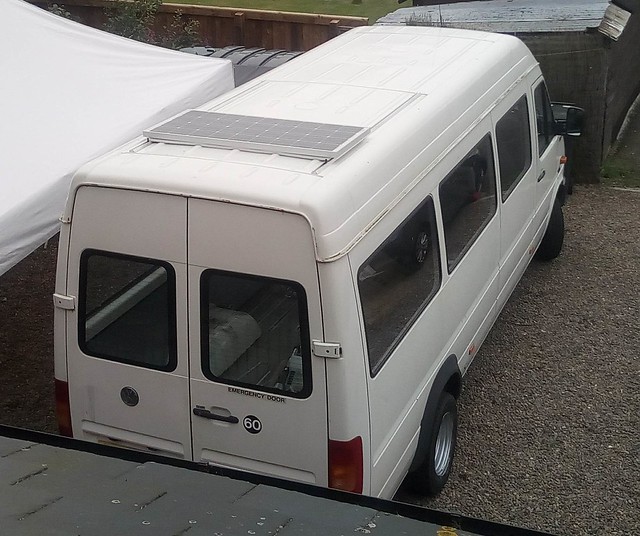 LT - Solar Panel Test LT - Solar Panel Test by David, on Flickr (the panels will be at the front, but it is easier to try things out when up a ladder at the rear) The distance from panel end and roof end is a lot less then I would expect given the extra size of the vehicle. I don't think I took account of how much the roof slopes in after the window top, and how the T5 sides are much closer to vertical all the way! The plan was to have the roof track against the side as it drops down, like you see here ... 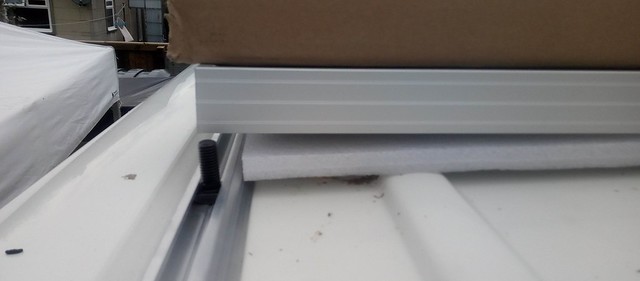 LT - Roof Track Edge LT - Roof Track Edge by David, on Flickr But the bolt end will be too close to a bracket end if it were a simple "L" style. I could move the tracks in-board? this is halfway between the edge and the first rib ... 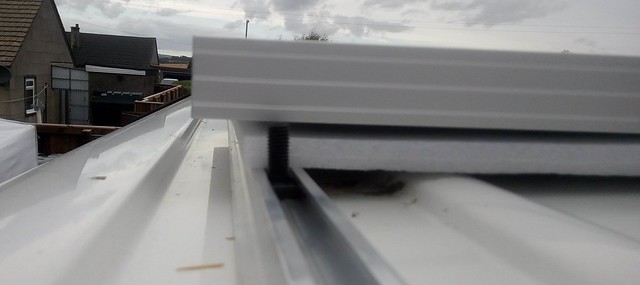 LT - Roof Track Inside LT - Roof Track Inside by David, on Flickr Another alternative is fitting the track to the raised roof edge. This would give a distance more typical for panel installs, where the supports are outward of the panel, but I don't like that idea much :N While I really prefer to fit things in a symmetrical manner, I think I will need to slightly off-set the panels to allow the best fitting of these. The other aspect I need to deal with, which should be fairly easy with brackets is having the panel clear the roof centre. This photo shows the clearance between the sides and the centre ... 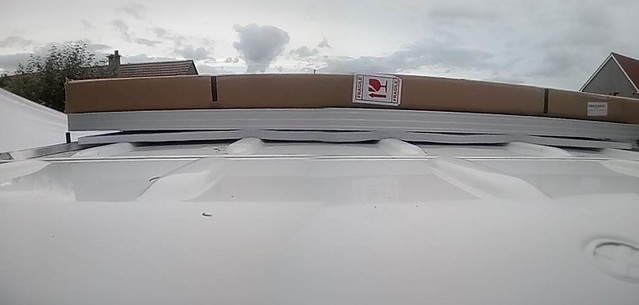 LT - Solar Panel Spread LT - Solar Panel Spread by David, on Flickr If the panel was sitting on the tracks, it would be about 5mm too low in the middle (the photo is a panoramic one and the panel is actually dead straight despite appearance to the contrary  ) The LT/Sprinter Mk1 has no roof prep from the factory and no racking system available off the shelf except the ugly commercial gutter mounted kit  So I had to do my own instead! I am using a seat tracking system made by Unwin and bought from Stedells. Comes in 5 Meter lengths and I cut to size to avoid going over the roof seams. This is it offered into position as a test. 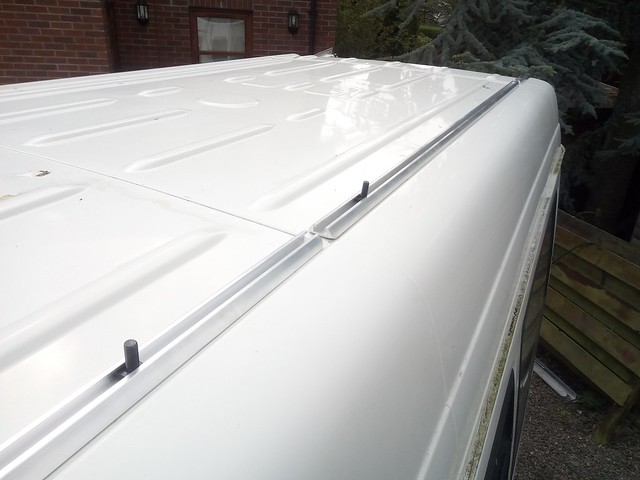 Tracking Tracking by David, on Flickr I decided to install it using a minimum of mechanical mounts and used 3M VHB tape instead as the primary fixing method. I did use bolts at each end as a backup just in case but I don't think they are really necessary. Used High Tensile 8.8 bolts, and had to countersink them to allow the captive fixing bolts that run in the track to go in and out. 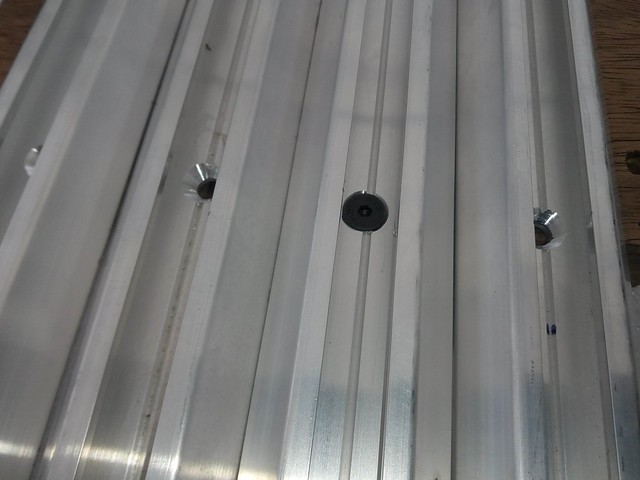 Roof Tracks Closeup Roof Tracks Closeup by David, on Flickr The reason I wanted a Track system was so I could add Solar Panels and other roof "furniture" without having to drill holes all over the place. I also wanted to be able to maintain the panels and adjust things, so having a track makes everything so much more flexible. To fit the panels onto the track I used the "Z Brackets" which are popular in the US. These were ideal for my application as I needed to raise the panels a little to clear the centre roof ribs (the roof curves up to the middle) and the Z Brackets do this by design. Had to make an adjustment to the panel to relocate the brackets to suit the tracking 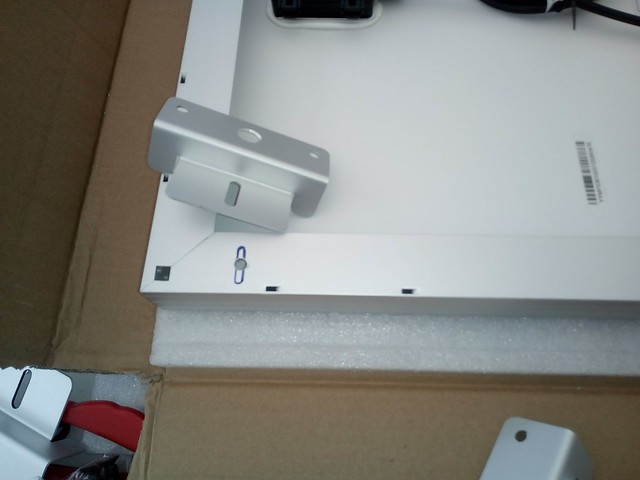 Panel Prepped Panel Prepped by David, on Flickr And also modify the bracket to suit the large captive bolts the tracking uses by drilling an oversized centre hole in the foot 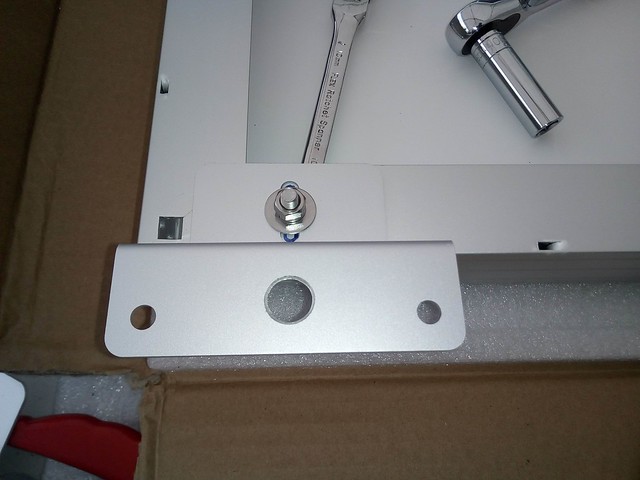 Panel Bracket fitted Panel Bracket fitted by David, on Flickr Once that is done, time to try the first panel for size ... 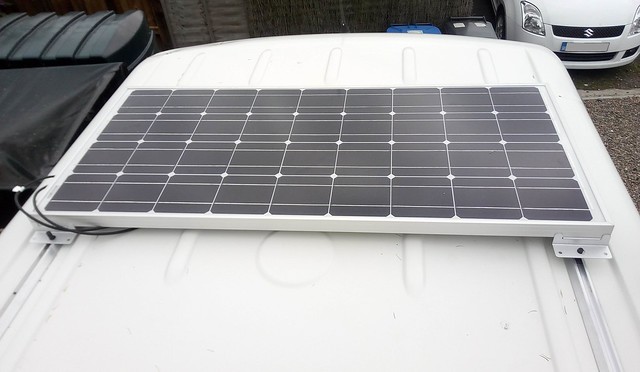 Single Panel Single Panel by David, on Flickr Looking Good  Needed to extend a cable on one of the panel by about 50cm to suit my solar panel wiring choice, but once that was done, I could fit the remaining panels in place 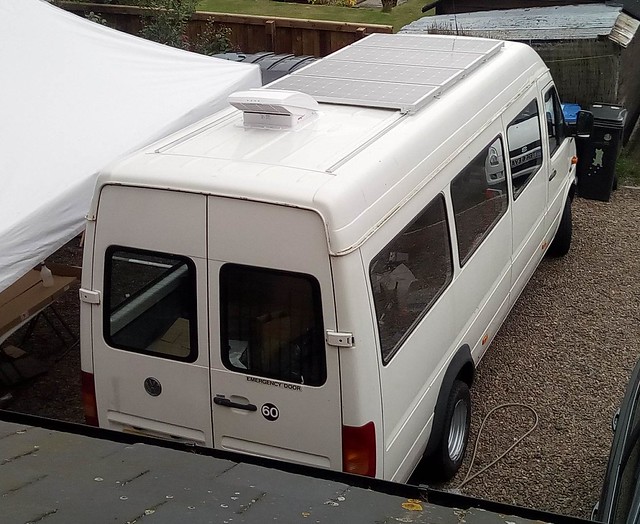 400W in Place 400W in Place by David, on Flickr Looking pretty good if I do say so myself  All the panels are individually and easily removable. I have configured them as a Series/Parellel combination which IMO is the most all-round efficient setup - having each pair in series ups the voltage and makes the MPPT controller maximize its effieciency; and having the two pais then connected in parallel minimizes any shading effect on a single panel (if you had the whole array as a single series, and a portion of ANY panel was shaded, the whole arrays solar harvesting would drop dramatically). By the time I finished the recabling the light was pretty much gone, so I will need to wait until morning to see what I get (the whole lot is only connected to the starter battery plus a 36Ah battery right now so won't be a true story yet) That is the major work on the roof addtions done, but still some additions to make 
|
|
|
|
Post by Hoovie on Feb 8, 2018 20:34:23 GMT
Light BarSpeaking of the above ..... Still in the box 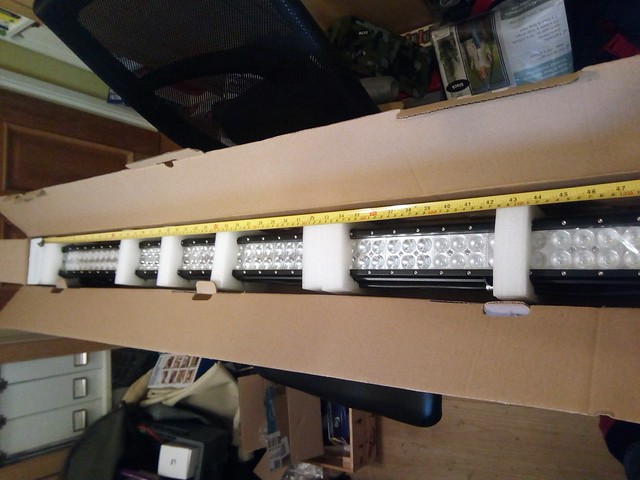 Light Bar Light Bar by David, on Flickr 329W of goodness in 49" :s_cool 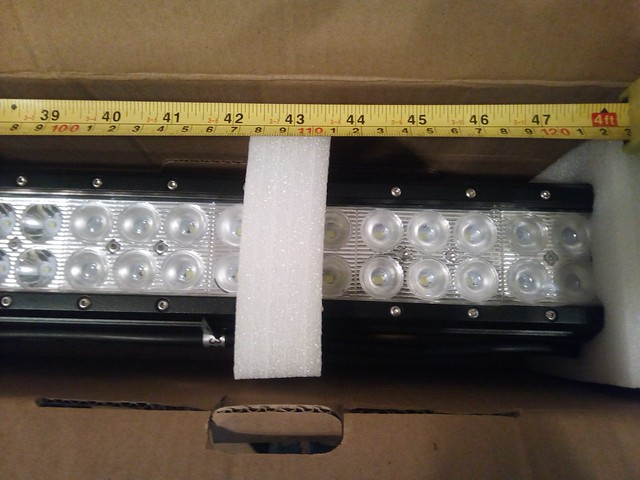 Light Bar - Length Light Bar - Length by David, on Flickr Going to have it setup so it can be switched on with the main beam, always off, or switched on directly
|
|
|
|
Post by Hoovie on Feb 8, 2018 20:35:05 GMT
Some WoodworkingSeems like I am skipping around all over the place doing this conversion, but basically I have two main threads of work going on - one external, and one internal, and which I do depends on what the man upstairs is doing (i.e. is it raining or not :s_cool ) Today the weather did not look too clever so it was the inside stuff going on .... So I had this pile of plywood 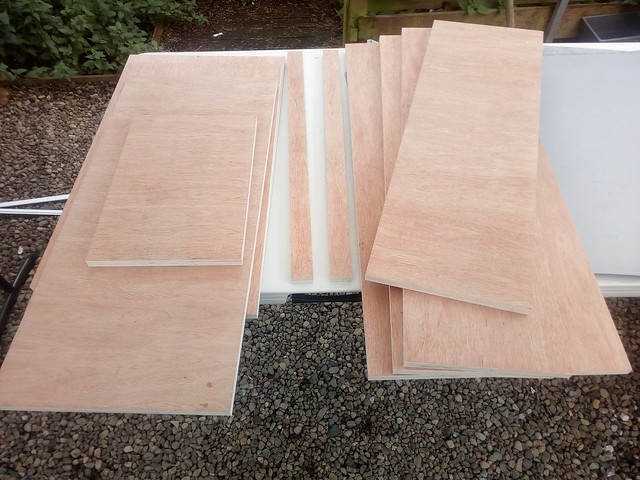 Board Board by David, on Flickr And I had this selection of tools and stuff, plus a rough sketch 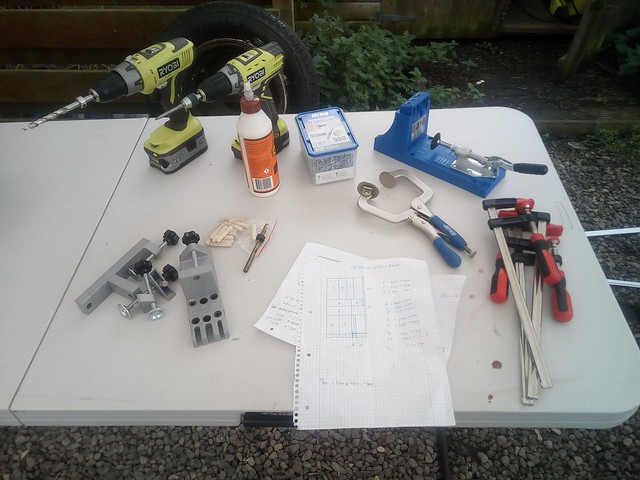 Tools Tools by David, on Flickr First thing to do ... drill the pocket screw holes in all the places. This is a couple of the boards after prepping. I am using the Kreg K4 Jig and it is so quick and easy AND precise to use. Way better then freehand drilling and screwing I reckon [/div] 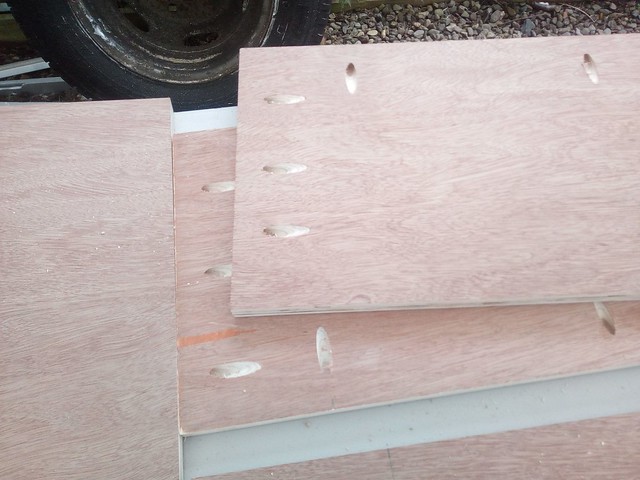 Pocket Screw Prep Pocket Screw Prep by David, on Flickr I also routed out a couple of channels for a board to drop in (this will be clearer in the next photo  ) Work in progress 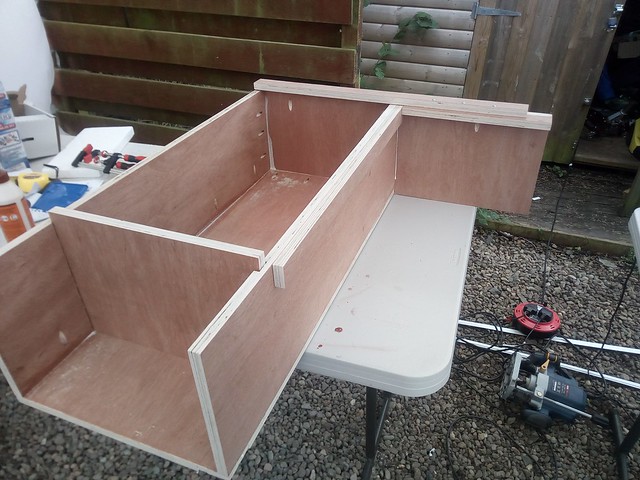 WIP WIP by David, on Flickr Using wood glue as well as the pocket screws to secure the boards. I don't think the glue is necessary for strength, but I think it may be beneifical to prevent any creaking. And my construction mostly completed and offered into place  Will it fit? Will it fit? by David, on Flickr Wondering what it is? Well, this photo should make it clear  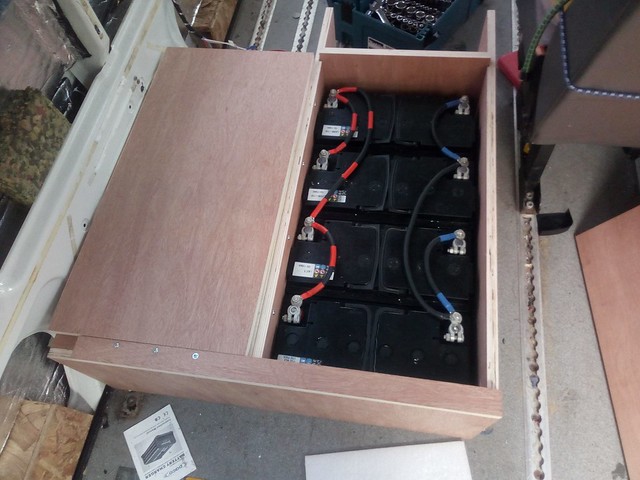 Test for Size Test for Size by David, on Flickr So yes, it is my heavy duty battery box, holding a bank of 4 110Ah AGM batteries :s_thumbsup The cabling is 25mm and is configured to have every individual battery in the bank balanced - every battery has a short and a long cable to the power takeoff point, and taking the +ve from the Top Left and the -ve from the Bottom Right ensures both the charge in and the draw out will be balanced to each battery equally  The board to the left of the battery section basically sits over the wheel arch 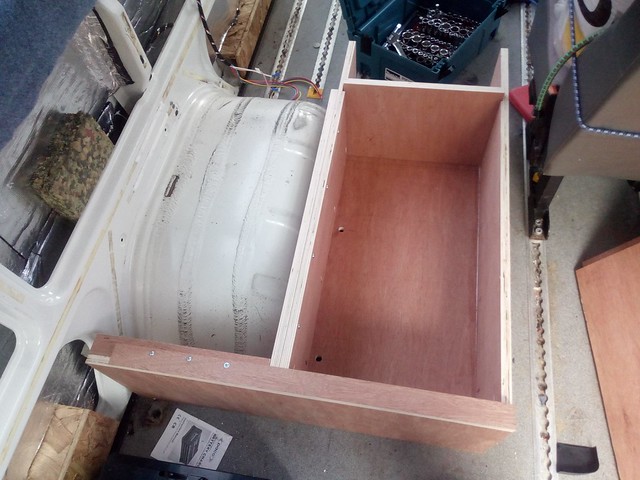 Wheel Arch Wheel Arch by David, on Flickr I will be using that board to layout and secure all my various electrical components such as Inverters, Solar Controller, Battery Charger, etc that I don't need to generally access once installed to give a super clean installation. All looks good, so I will be taking this out to finish fitting some components, drilling holes for cables to come out of the battery bank for the electrics. The box itself will be secured to the chassis via a pair of large M8 bolts into the floor (the last photo shows the two holes for that) and insulation & cushioning for the battery section installed (batteries loose power when cold, so enclosing the batteries like this and insulating will maximise their stored capacity)
|
|
|
|
Post by Hoovie on Feb 8, 2018 20:37:29 GMT
A New Look and Camperbus OverviewI actually completed the paintwork today, so thought I would do an updated post ... OK. So this afternoon reached a milestone point in my Camperbus conversion The Exterior is all done I wanted to achieve a specific look with this vehicle, and as mentioned, I wanted to do something I have wanted for over 50 years :shok: So...... Without further ado .... Let me introduce you to "Clarence", my Daktari-inspired Overland Safari CamperBus 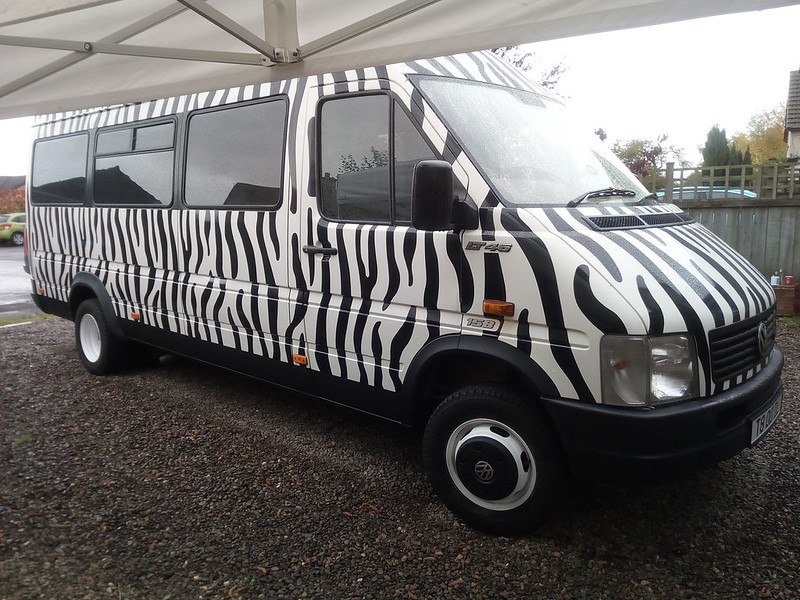 IMG_20171014_123107 IMG_20171014_123107 by David, on Flickr 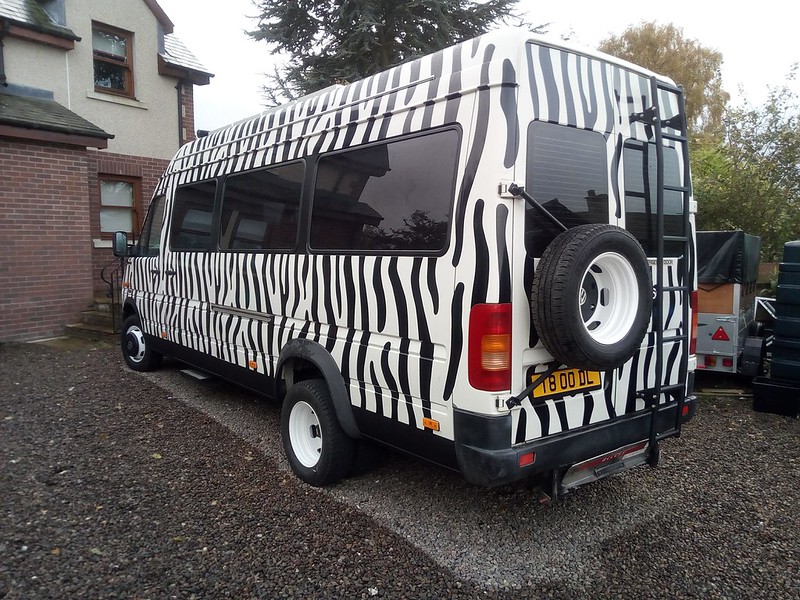 IMG_20171014_145922 IMG_20171014_145922 by David, on Flickr At the rear there is a custom Spare Wheel Carrier that I commisioned from a local engineering company, plus a Rhino 8-rung Door Mounted Ladder to access the roof-mounted Rhino Luggage basket (not fitted to the rails yet) Added a lower section in black to tie the bumpers and wheel arch extensions together, and added a black accent to the front arch to give a coherent feel to this. 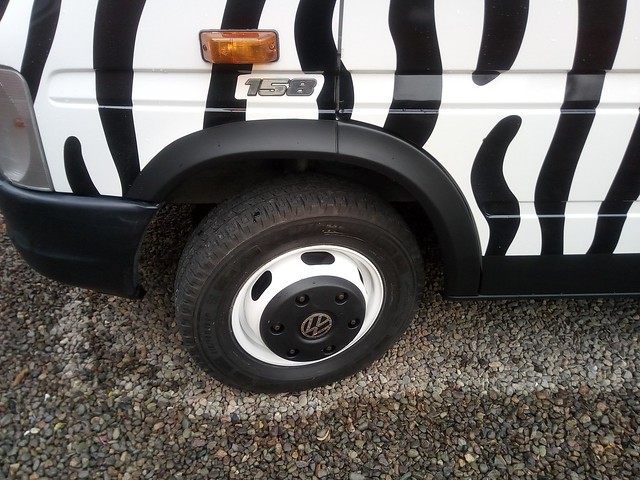 IMG_20171014_145951 IMG_20171014_145951 by David, on Flickr Wheels were blasted to clean up as well as possible and then powercoated in white, then a matt lacquer applied to give extra protection (fighting the rust away from Steel wheels is a losing battle, but PC plus the extra lacquer layer gives the best fighting chance to delay the inevitable) All 6 wheels are fitted with TPMS sensors, which is very handy as the inner rear wheels are a pig to access the valves to check. The Windows have a "Limo" Tint applied, which is 5%. This means that 95% of the light is blocked from coming in, which will be very good in the summer and provides great privacy while still allowing a fine visibility level when inside and looking out. it is as if you are wearing sunglasses. On the roof, we have a 400W PV Array, made up of 4 x 100 Monocrystalline PV Panels in a Series/Parallel combination configuration, going via a Victron 100/30 Blue Solar Controller to a 440Ah Battery Bank, comprising 4 x 110Ah Heavy-Duty Leoch AGM Batteries.  PV Panels PV Panels by David, on Flickr  IMG_20171001_162501 IMG_20171001_162501 by David, on Flickr This combination of PV Array and Battery Bank should provide a very usable off-grid capability. Also on the roof is a 10-speed thermostatically controlled Fan, namely the Maxxfan 7000k  Fan from Rear Fan from Rear by David, on Flickr This fan features an integral cover that allows the fan to be used rain or shine, and also when driving. It can be set to Automatic mode which will adjust the fan speed depending on the difference between actual and target temperatures, opening and closing the motorised cover as need be. The fan can also be set to bring air in as well as expel it for extra flexibility and is controlled via a remote for ultimate laziness  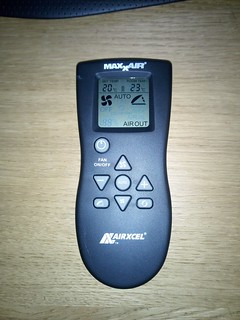 Fan Remote Fan Remote by David, on Flickr I have no doubts the appearance of my Camperbus will have a marmite affect but we absolutely love it and at last I have a "Dakari" vehicle that I have wanted since first watching the TV program in the mid-60's  I was going to get the stripes off the guy and do it myself. I have done some vehicle graphics and could make maybe a passable attempt, but when he offered to come up and do it in exchange for the supply and install of some batteries and stuff, it was an offer I couldn't turn down :s_thumbsup I did the bottom strip myself though :s_cool I think it was definitely worth doing
I think comparing the exterior look of the van now compared to when I first brought it home is pretty massive. BEFORE:  ParkedUp ParkedUp by David, on Flickr AFTER:  IMG_20171014_123107 IMG_20171014_123107 by David, on Flickr To me, it looks a lot more modern (thinking due to the Window treatment and lower black strip) now and doesn't look like a 14 year old van (or indeed a model first introduced 20 years ago) I will be fitting a tow bar by next May  reason that far away is I don't need it before then and I have a hydraulic wheelchair lift fitted where the towbar would go. I am hoping someone will come along and remove the lift for me in exchange for keeping it (it is a very heavy item and if I get the garage to do it, it will cost over £100). Advertised on gumtree and still got 6 months or so left to be patient with it  Got some stripes left over so might mod the trailer to match as well  (Looking at the pictures reminds me I want to swap the side indicators for later model clear ones as well  )
|
|
|
|
Post by Hoovie on Feb 8, 2018 20:38:22 GMT
Something I've been meaning to sort out for a while now is the untidy rear hubs and the tyre valves ... Rear HubThis is after I first bought it and had the tyres replaced: 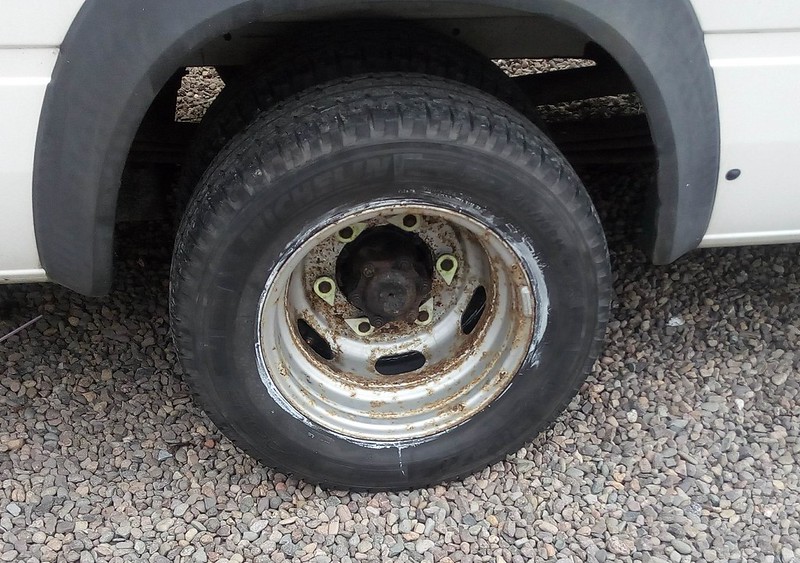 LT Rear-Beforepaint LT Rear-Beforepaint by David, on Flickr Wheels all rusty so the rusty hub doesn't stand out too much (colour coded maybe  ) But once I had my wheels tidied up and powdercoated, the rear hubs really did spoil the appearance: 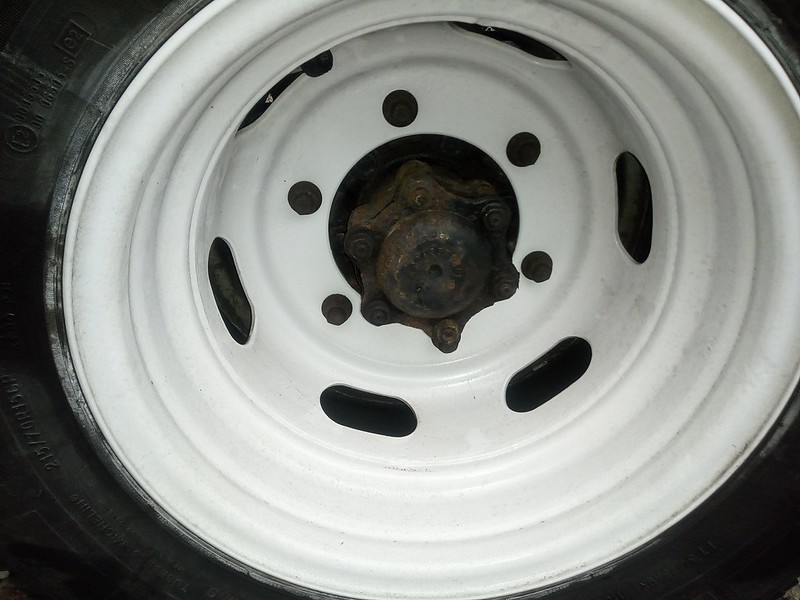 IMG_20171205_142727 IMG_20171205_142727 by David, on Flickr (PS, I haven't actually washed my van since the wheels were done in first week in October, and they still look pretty decently white :cool: ) So van jacked up, wheels off and hub wire-brushed and the back part all plastic-wrapped ready for paint: 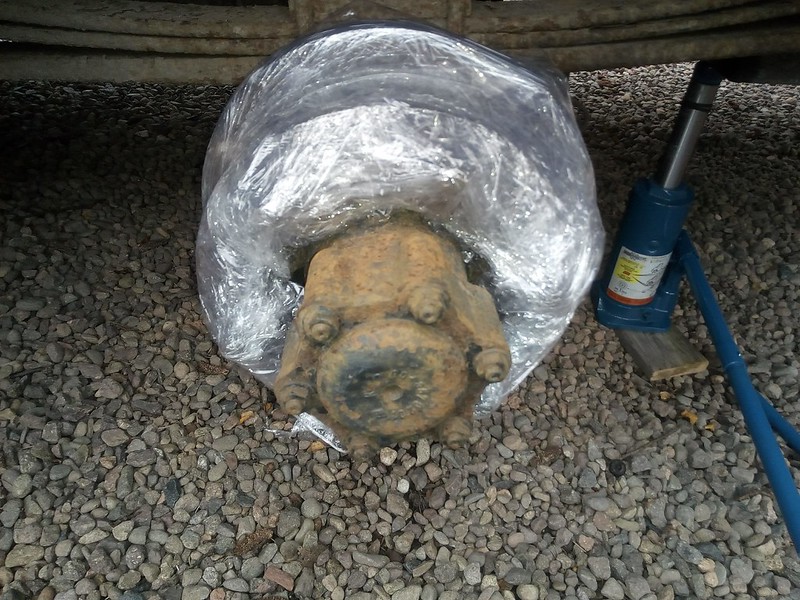 IMG_20171205_141114 IMG_20171205_141114 by David, on Flickr (PS. For those of a nervous disposition, don't worry - the bottle jack half on a narrow piece of wood is NOT holding the van up!! That is doing something else and I have a 2t trolley jack which is out of view doing the support work) And time to paint: 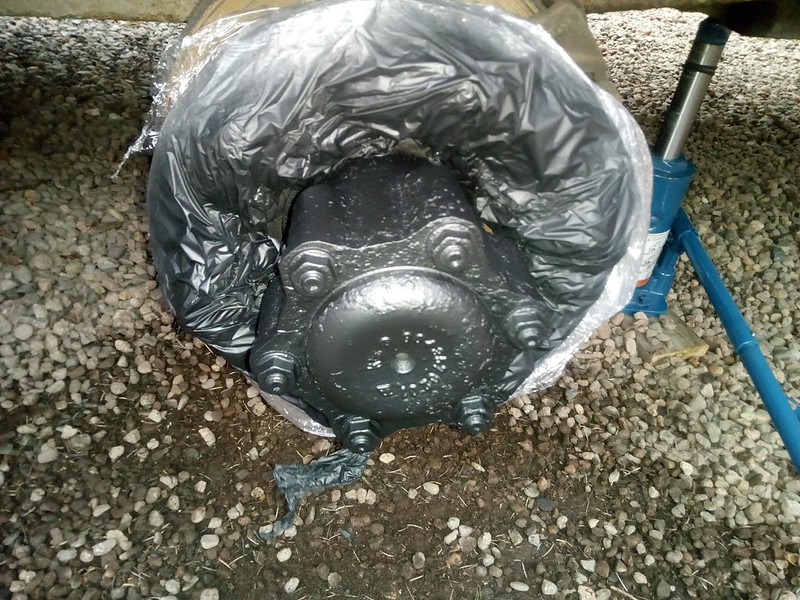 IMG_20171205_145126 IMG_20171205_145126 by David, on Flickr Now I was originally going to use the typical hammerite brush paint on this, but decided to use the Hammerite Anti-Chip Aerosol paint I used on the lower part of the bodywork as it sprayed so nicely and is very fast drying (time is limited on this project as got three seperate tasks I need to complete before the light goes) And wheel back on with painted hub done: 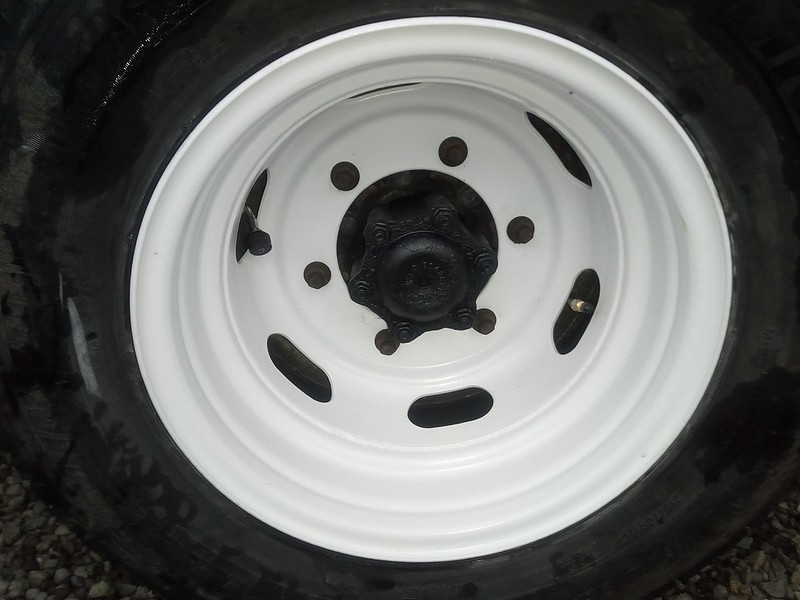 IMG_20171205_150145 IMG_20171205_150145 by David, on Flickr A big improvement I think A: Tyre ValvesAs I mentioned previously, checking pressures on a Dually is a nightmare! The Inner wheel valve is near impossible to get to and the Outer wheel valve faces inwards and is nearly as bad as the Inner to check. I bought some long (think 120mm?) rubber extensions and once I had the wheels off, I could securely fix the extensions: 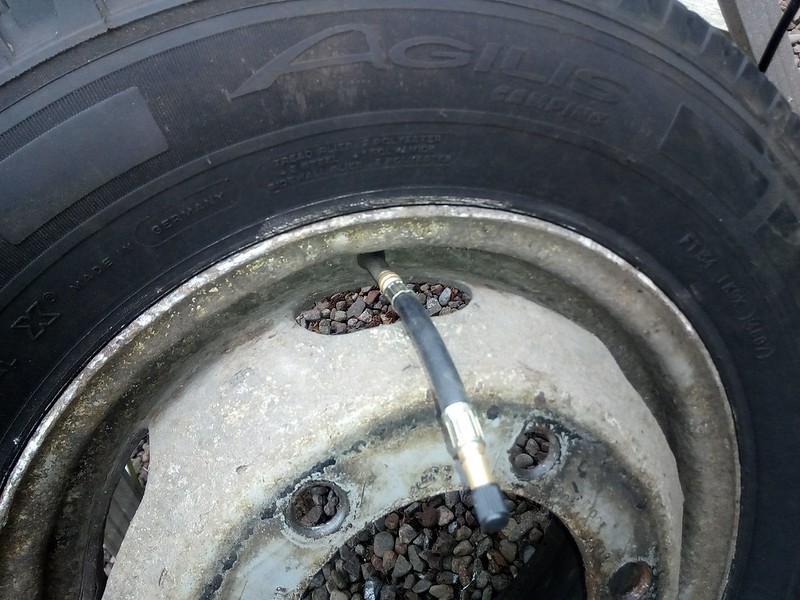 IMG_20171205_141510 IMG_20171205_141510 by David, on Flickr (I didn't bother getting the Inner Wheels redone as they are not visible (in fact, if I had them white as well, they would make the rear look actually worse I think as would get dirty and very hard to clean up) and also saved nearly £100 by leaving them as is!) I had to wait to have full access to the wheel so I could tighten up the extension really tightly. I had some U-Shaped extensions for the outers, but they have tended to loosen and cause a slow deflation as I couldn't tighten up except by hand, so why I waited for full access to wheels to fit inners, and also tightened up (hopefully!) the Outer extensions. So going back to this photo:  IMG_20171205_150145 IMG_20171205_150145 by David, on Flickr On the right you can see the rubber extension from the Inner wheel poking through the outer wheel hole, and on the left you can see a TPMS sensor which is on the end of the U-Shaped extension. Fitted the valves opposite each other so the extra weight should hopefully cancel each other out and avoid inbalance vibration :* I'll be fitting the Inner wheels TPMS sensors once I have rechecked the pressures  So that is two of the three jobs I did in one hit. The third one will be in the next update 
Still have a big under-chassis lift like below! 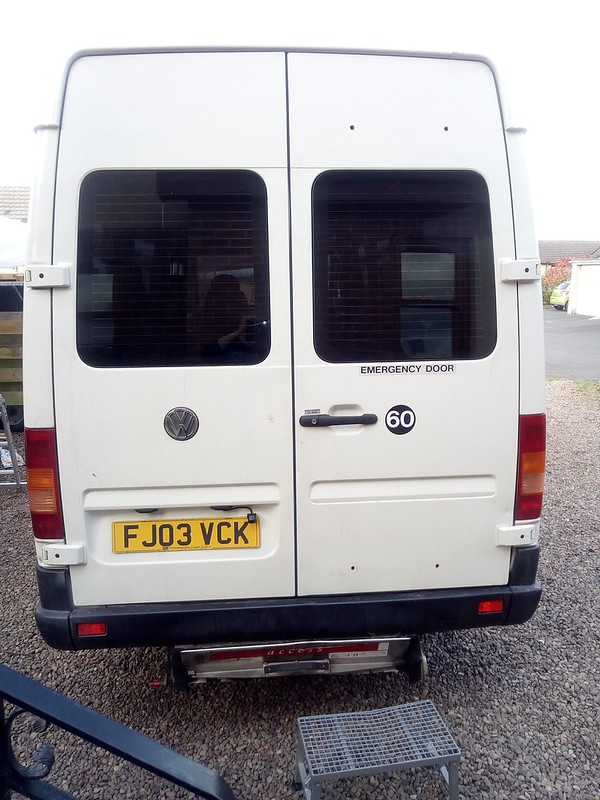 Rear Repaint Rear Repaint by David, on Flickr This is the lift extended out! 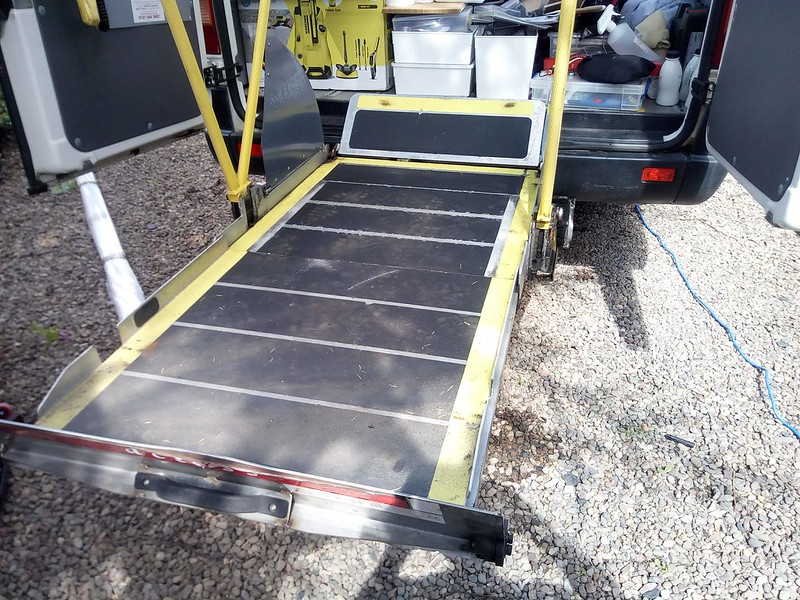 Extended Lift Extended Lift by David, on Flickr I don't really have a use for a hydraulic lift, and I want to fit a towbar as well, and it is a matter of either/or and not both, so the lift had to go. Plus it is incredibly heavy! I got a quote of £100+ (the £100 was the cheapest possible, the + bit was more likely to happen) from my local garage to remove, so that wasn't gonna happen. The nuts to the bolts securing the lift to the brackets were not captive, so as I loosened the bolt it just spun round, and the bolts holding the brackets to the chassis were covered by the lift  So time to break out the grinder  After removing the +12V supply cable (chunky 16mm job) and control cable from the control section to the van, then had to remove the rear wheels to access the front brackets (hence why I also did the stuff in the previous post), so did that and sliced the brackets - doing one side at a time for safety. Then did the rear brackets (much easier to access!). Had the lift supported by jacks so it didn't just drop when the brackets cut through, then lowered the jacks and after a double-check drive forwards ... 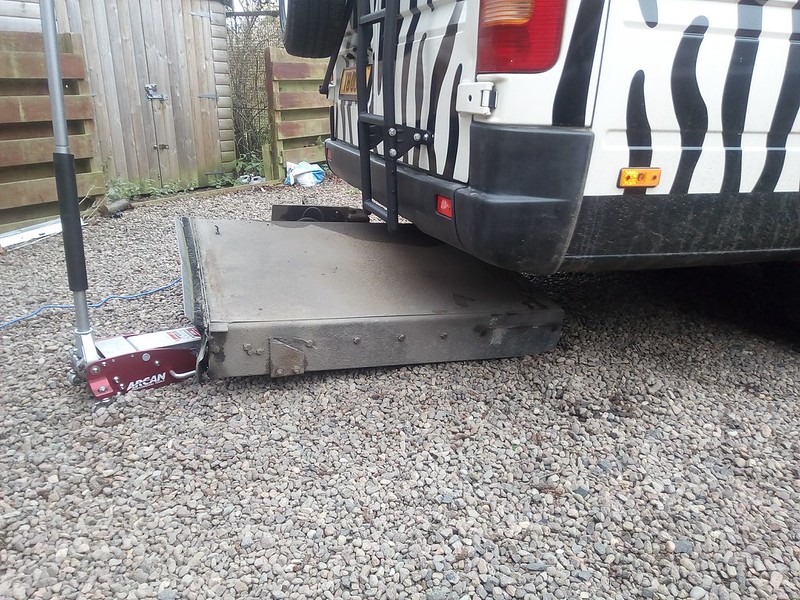 IMG_20171206_102742 IMG_20171206_102742 by David, on Flickr And the Lift free and clear! 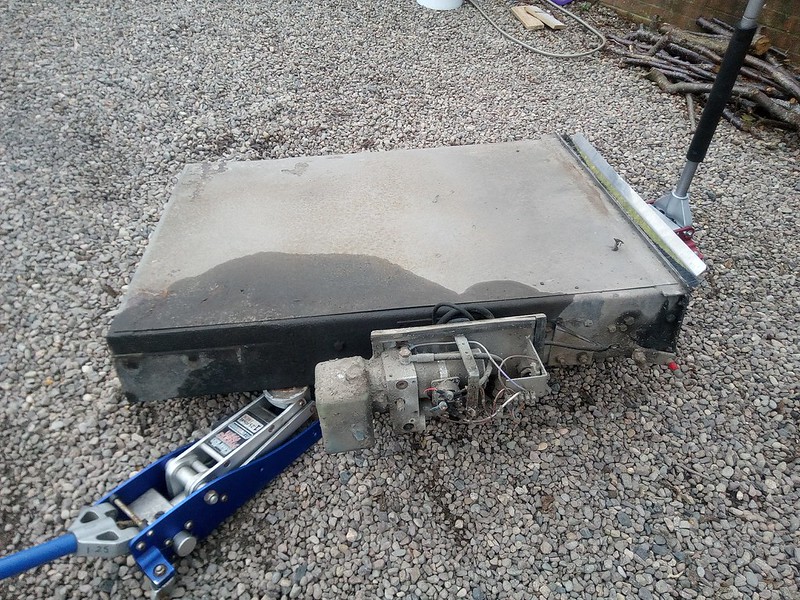 IMG_20171206_104136 IMG_20171206_104136 by David, on Flickr Now I don't know how much this weighs, but I cannot move it from where it dropped down on the driveway. Having a gravel driveway does not help for sliding but it is HEAVY HEAVY! The companies tech sheet for the current ACCESS Lift says "Fuel consumption savings due to lighter weight – only 165kg" - so not much then! That is for a 400Kg SWL and mine was a 300Kg SWL, but I doubt if there is any significant weight difference ( but it is sure a weight off the back of my Camperbus!). This out the way should improve my fuel consumption a little anyway 
Lift Update....Now I arranged for this to be collected before Christmas but never was and given up waiting. Out with the angle grinder again to chop up into manageable pieces to take to the Recycling Centre.... 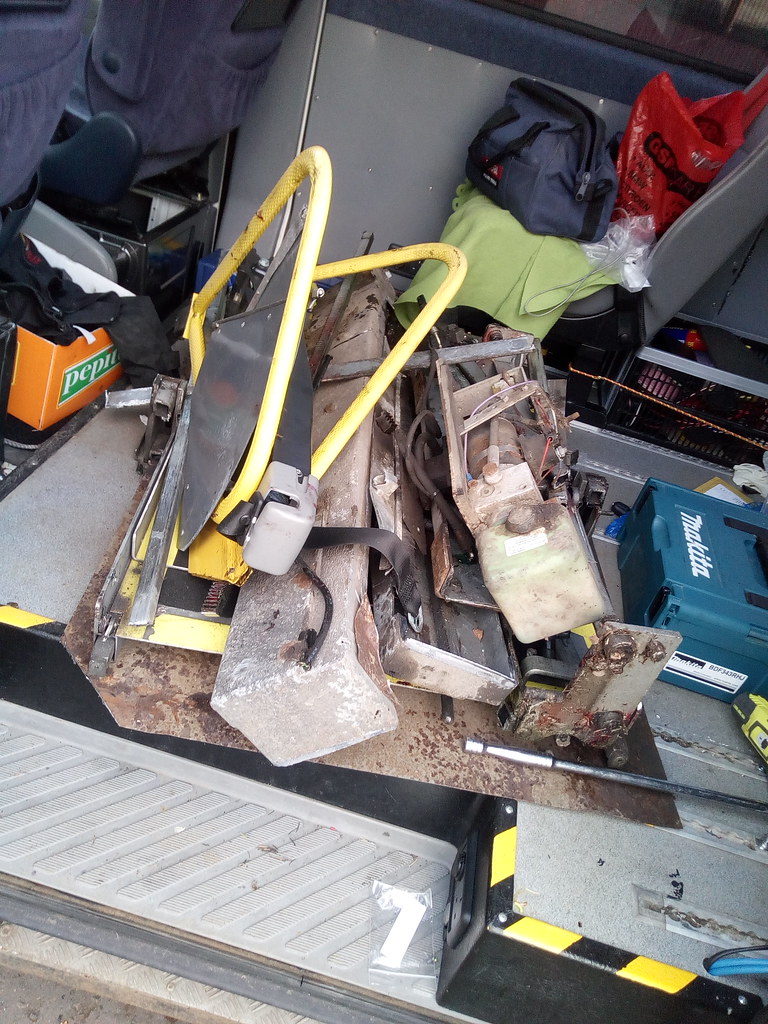
Deconstructed Chair Lift by David, on Flickr Good to have that out the way. It was a shame it couldn't find a new home as was in good working order but c'est le vie. |
|
|
|
Post by Hoovie on Feb 8, 2018 20:43:51 GMT
So that is a (slightly) condensed history of my Campervan Selfbuild. As I make further updates and changes to the vehicle I will post them up  |
|
|
|
Post by Hoovie on Feb 18, 2018 17:39:31 GMT
Starting to do some more work on Clarence ... Installed a Towbar this afternoon on the LT T: Bought it through eBay from a German Seller in Poland - Seller: mclp-discount-deProduct Link: www.ebay.co.uk/itm/VW-Lt-28-46-1995-2006-II-2D-VAN-Flange-Towbar-Electrics-13Pin/191923047957?ssPageName=STRK%3AMEBIDX%3AIT&_trksid=p2057872.m2749.l2649Tools Needed (for my Kit):19mm, 18mm, 17mm & 16mm Socket/Spanners Torque Wrench Well Packaged: 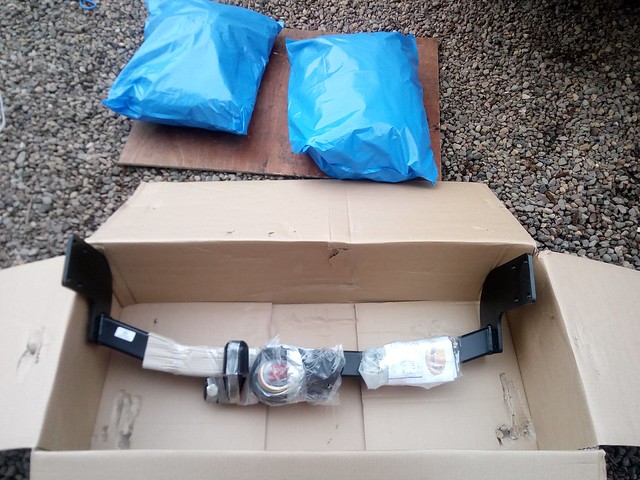 T T
B What is in the Box by David, on Flickr Package contained Instructions, Towball & Cover, 13-Pin Electrics Kit and all Bolts, Washers and nuts 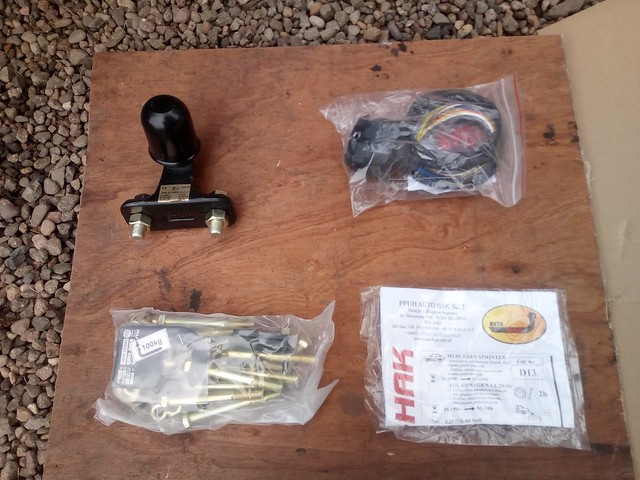
TB Fittings by David, on Flickr Instructions in around 15 languages and basic, but contained all info needed to install 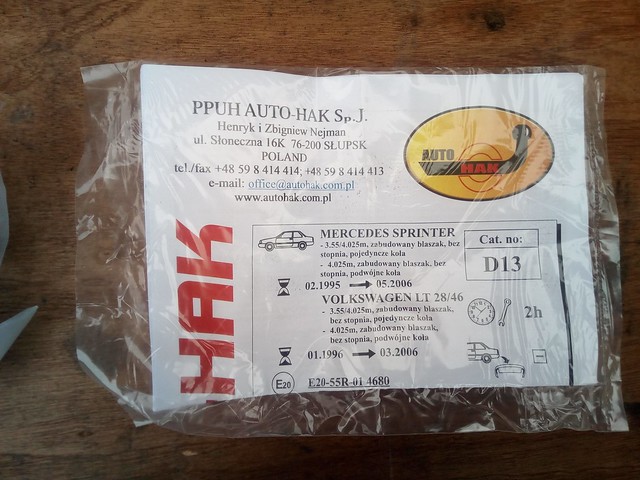
TB Instructions by David, on Flickr Put Towball and Electrics aside to check through fittings 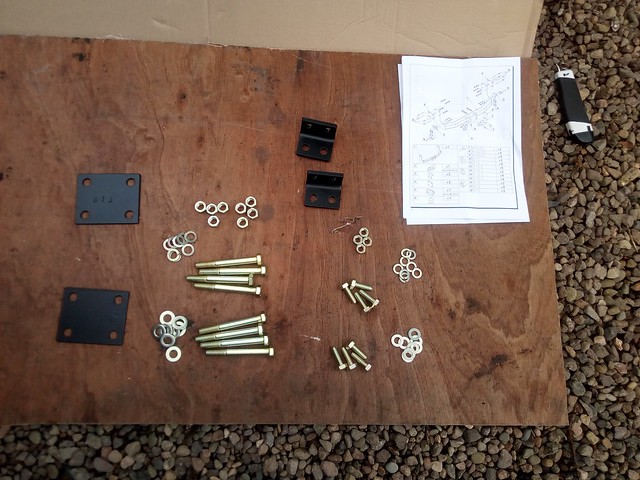
TB Fittings Unpacked by David, on Flickr Now just a matter of following instructions ... Put plate in place both sides and pushed bolts in to keep in place and ready to push through all the way to hold towbar. First bolt pushed in 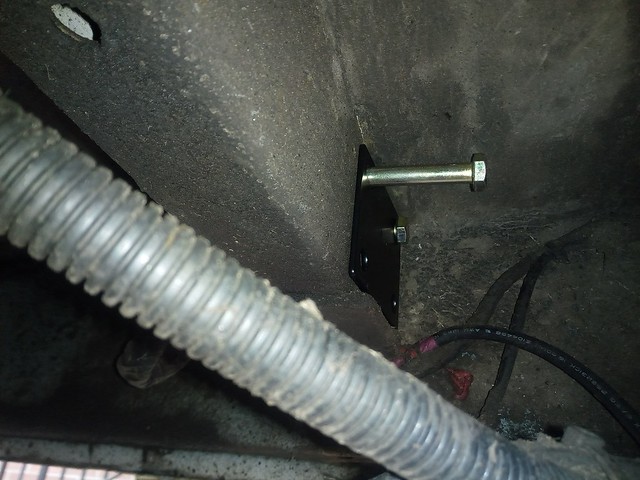
TB Step 1 by David, on Flickr Lifted Towbar up to position and pushed bolts through 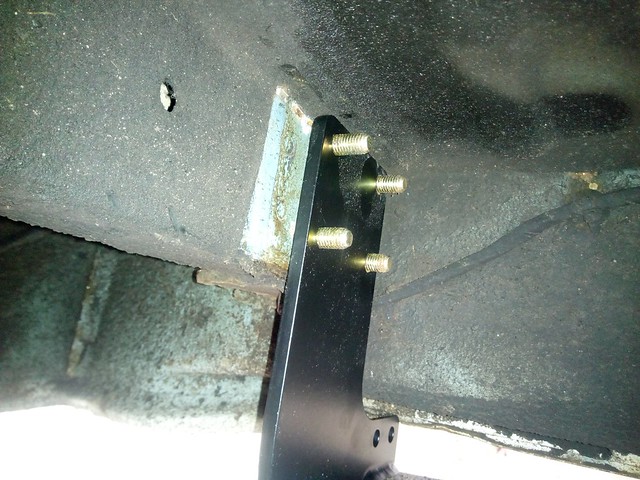
TB Step 2 by David, on Flickr If you have help then it is really easy to do this at each end. if on your own just lift from the centre and reach over to push the bolts in (still easy to do) Fitted Washers, Lock Washer and Nuts 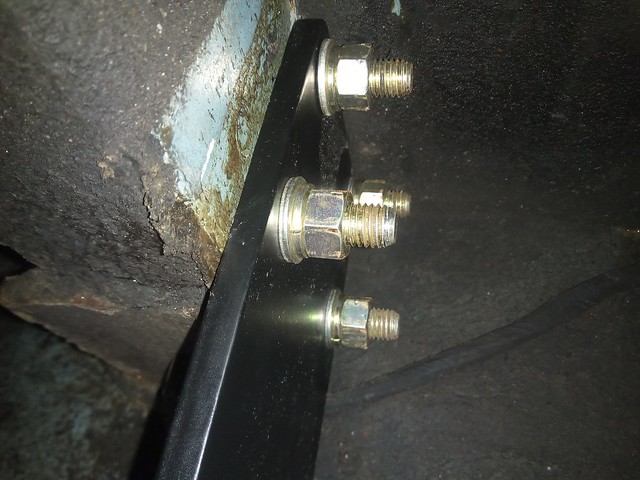
TB Step 3 by David, on Flickr Repeat process on other side. Then fit the lower angle plate and bolts, washers and nuts 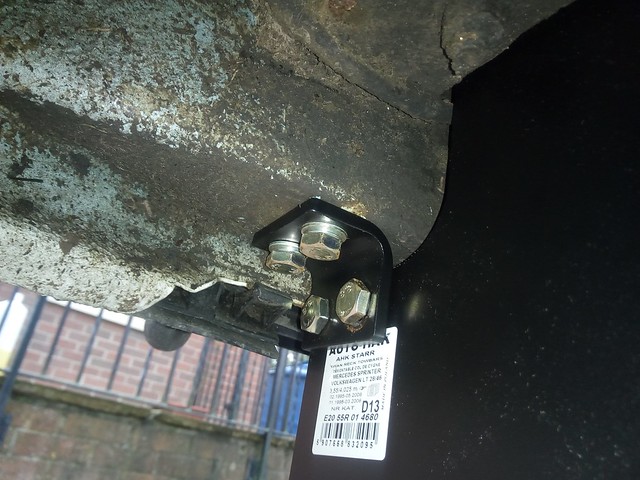
TB Step 4 by David, on Flickr Tighten up all fittings 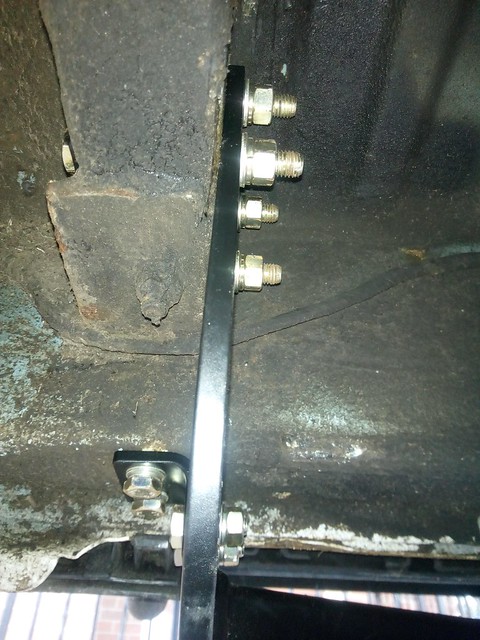
TB Step 5 by David, on Flickr The instructions provided gave required Torque Settings for all the bolts - M12 were 87Nm and M10 were 50Nm. And Main Metalwork all in place 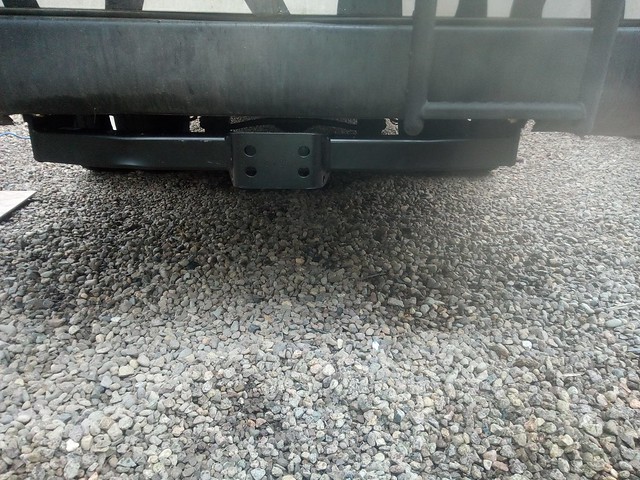
TB Step 6 - Hardware Fitted by David, on Flickr I didn't have a spare wheel carrier to deal with, but if you do, once it is dropped to provide access, all the above took well under 90 minutes to do. The more observant readers might have noticed I have a bumper cut? this was for the previous Hydraulic Lift and is not required for the Towbar. Fitting TowBall will take around 5 minutes. Not looked at Electric wiring for this yet. I think the kit I bought may not contain the audible buzzer for the indicator (this is a UK-only requirement apparently and I bought a multi-national kit) but they are just a couple of quid to buy (and I have a few lying around anyway). |
|
|
|
Post by charliefarlie on Feb 18, 2018 18:14:40 GMT
Not really into colour schemes like that but I think in this case it looks dead cool. No way can we mistake your van for any other on the road. Van is coming along nicely !!!
|
|
|
|
Post by Hoovie on Feb 18, 2018 18:38:40 GMT
Thanks. It was a scheme I have wanted on SOMETHING for literally decades and decades and when the opportunity came along, had to do it  Today was first day in ages I was outside and not shivering! maybe Winter has broken at last?? Heading south in a few days (in the car) to the NEC Caravan and Motorhome Show. Any MHers or Tuggers going? |
|


